Stable Diffusion Text-to-Image デモ
この Jupyter ノートブックは、ローカルへのインストール後にのみ起動できます。

Stable Diffusion は、テキストから画像を生成したり、画像の欠落部分を復元したり (修復) するなど、興味深い方法で画像を生成および操作できる革新的な生成 AI 技術です。
Stable Diffusion v2 は、より多くのデータを使用でき、より多くのトレーニングを採用できる、データセットのフィルタリングの制限が少ないなど、以前のバージョンよりも優れた機能を提供します。これらすべての機能により、幅広い入力テキストプロンプトの選択において有望な結果が得られます。
注: これは、デモ目的ですぐに開始できるようにする、236-stable-diffusion-v2-text-to-image ノートブックの短縮バージョンです。このバージョンには、モデルを PyTorch から ONNX へ、さらに OpenVINO へ変換するのに必要なヘルパー・ユーティリティーと、ノートブック内の OpenVINO OVStableDiffusionPipeline が直接実装されていません。テキストから画像への安定した拡散の完全な実装を確認したい場合は、236-stable-diffusion-v2-text-to-image を参照してください。
目次
ステップ 0: 前提条件のインストールとインポート
Stable Diffusion v2 を使用するには、Hugging Face Diffusers ライブラリーを使用します。
Stable Diffusion モデルを試すために、Diffusers は他の Diffusers パイプラインと同様に StableDiffusionPipeline と StableDiffusionInpaintPipeline を公開します。
%pip install -q "diffusers>=0.14.0" "openvino>=2023.1.0" "transformers>=4.31" accelerate "urllib3==1.26.15" --extra-index-url https://download.pytorch.org/whl/cpu
WARNING: Ignoring invalid distribution -orch (/home/ea/work/ov_venv/lib/python3.8/site-packages)
WARNING: Ignoring invalid distribution -orch (/home/ea/work/ov_venv/lib/python3.8/site-packages)
WARNING: Ignoring invalid distribution -orch (/home/ea/work/ov_venv/lib/python3.8/site-packages)
WARNING: Ignoring invalid distribution -orch (/home/ea/work/ov_venv/lib/python3.8/site-packages)
WARNING: Ignoring invalid distribution -orch (/home/ea/work/ov_venv/lib/python3.8/site-packages)
WARNING: Ignoring invalid distribution -orch (/home/ea/work/ov_venv/lib/python3.8/site-packages)

[notice] A new release of pip available: 22.3 -> 23.2.1
[notice] To update, run: pip install --upgrade pip
Note: you may need to restart the kernel to use updated packages.
ステップ 1: Stable Diffusion v2 基本コンポーネント
テキストから画像への変換とインペインティングの両方で安定した拡散パイプラインは、次の 3 つの重要な部分で構成されます。
条件を作成するテキスト・エンコーダー。例えば、テキストプロンプトから画像を生成したり、インペインティングを実行して無限のズーム効果を作成したりします。
段階的にノイズを除去する潜像表現のための U-Net。
潜在空間を画像にデコードするオートエンコーダー (VAE)。
パイプラインに応じて、これらの部分のパラメーターは異なる場合があり、このデモでそれについて説明します。
ステップ 1.1: Hugging Face からコンポーネントを取得
まず、Hugging Face からこれらのコンポーネントを取得しましょう。
以下のコードは、stable-diffusion-2-1 を使用して StableDiffusionPipeline を作成する方法を示しています。
# Retrieve the Text to Image Stable Diffusion pipeline components
from diffusers import StableDiffusionPipeline

pipe = StableDiffusionPipeline.from_pretrained("stabilityai/stable-diffusion-2-1-base").to("cpu")

# for reducing memory consumption get all components from pipeline independently
text_encoder = pipe.text_encoder
text_encoder.eval()
unet = pipe.unet
unet.eval()
vae = pipe.vae
vae.eval()

conf = pipe.scheduler.config

del pipe
2023-09-12 11:59:21.971103: I tensorflow/core/util/port.cc:110] oneDNN custom operations are on. You may see slightly different numerical results due to floating-point round-off errors from different computation orders. To turn them off, set the environment variable TF_ENABLE_ONEDNN_OPTS=0.
2023-09-12 11:59:22.005818: I tensorflow/core/platform/cpu_feature_guard.cc:182] This TensorFlow binary is optimized to use available CPU instructions in performance-critical operations.
To enable the following instructions: AVX2 AVX512F AVX512_VNNI FMA, in other operations, rebuild TensorFlow with the appropriate compiler flags.
2023-09-12 11:59:22.607625: W tensorflow/compiler/tf2tensorrt/utils/py_utils.cc:38] TF-TRT Warning: Could not find TensorRT
Loading pipeline components...: 0%| | 0/6 [00:00<?, ?it/s]
ステップ 2: モデルを OpenVINO に変換
これら両方のパイプラインの 3 つの部分を取得したら、次の操作を行う必要があります。
モデル変換 API を使用して、元の PyTorch モデルを OpenVINO 形式に変換します。
ov_model_part = ov.convert_model(model_part, example_input=input_data)
OpenVINO モデルをディスクに保存します。
ov.save_model(ov_model_part, xml_file_path)
その後、OpenVINO で独自のデータに対して Stable Diffusion v2 テキストから画像への変換とインペインティング・パイプラインを実行できます。
from pathlib import Path

# Define a dir to save text-to-image models
txt2img_model_dir = Path("sd2.1")
txt2img_model_dir.mkdir(exist_ok=True)
from implementation.conversion_helper_utils import convert_encoder, convert_unet, convert_vae_decoder, convert_vae_encoder

# Convert the Text-to-Image models from PyTorch -> ONNX -> OpenVINO
# 1. Convert the Text Encoder
txt_encoder_ov_path = txt2img_model_dir / "text_encoder.xml"
convert_encoder(text_encoder, txt_encoder_ov_path)
# 2. Convert the U-NET
unet_ov_path = txt2img_model_dir / "unet.xml"
convert_unet(unet, unet_ov_path, num_channels=4, width=96, height=96)
# 3. Convert the VAE encoder
vae_encoder_ov_path = txt2img_model_dir / "vae_encoder.xml"
convert_vae_encoder(vae, vae_encoder_ov_path, width=768, height=768)
# 4. Convert the VAE decoder
vae_decoder_ov_path = txt2img_model_dir / "vae_decoder.xml"
convert_vae_decoder(vae, vae_decoder_ov_path, width=96, height=96)
ステップ 3: Text-to-Image 生成推論パイプライン
ステップ 3.1: Text-to-Image OpenVINO モデルをロードして理解する
ステップ 3.2: 推論デバイスの選択
OpenVINO を使用して推論を実行するためにドロップダウン・リストからデバイスを選択します。
import ipywidgets as widgets
from openvino.runtime import Core

core = Core()

device = widgets.Dropdown(
    options=core.available_devices + ["AUTO"],
    value='AUTO',
    description='Device:',
    disabled=False,
)

device
Dropdown(description='Device:', index=2, options=('CPU', 'GPU', 'AUTO'), value='AUTO')
テキストから画像への OpenVINO モデルのインスタンスを作成します。
text_enc = core.compile_model(txt_encoder_ov_path, device.value)
unet_model = core.compile_model(unet_ov_path, device.value)
vae_encoder = core.compile_model(vae_encoder_ov_path, device.value)
vae_decoder = core.compile_model(vae_decoder_ov_path, device.value)
次に、下の図に示すように、推論パイプラインを作成するいくつかの重要な要素を定義します。
text2img-stable-diffusion
OVStableDiffusionPipeline() クラスの一部として、以下の処理が行われます。
stable diffusion パイプラインは、潜在シードとテキストプロンプトの両方を入力として受け取ります。潜在シードはランダムな潜在画像表現を生成するために使用され、テキストプロンプトは OpenAI の CLIP に提供され、これらをテキスト埋め込みに変換します。
次に、U-Net モデルは、テキスト埋め込みを条件として、ランダムな潜在画像表現を繰り返しノイズ除去します。U-Net の出力はノイズ残差であり、スケジューラー・アルゴリズムを介してノイズ除去された潜在画像表現を計算するために使用されます。この場合、
LMSDiscreteSchedulerを使用します。
from diffusers.schedulers import LMSDiscreteScheduler
from transformers import CLIPTokenizer
from implementation.ov_stable_diffusion_pipeline import OVStableDiffusionPipeline

scheduler = LMSDiscreteScheduler.from_config(conf)
tokenizer = CLIPTokenizer.from_pretrained('openai/clip-vit-large-patch14')

ov_pipe = OVStableDiffusionPipeline(
    tokenizer=tokenizer,
    text_encoder=text_enc,
    unet=unet_model,
    vae_encoder=vae_encoder,
    vae_decoder=vae_decoder,
    scheduler=scheduler
)
/home/ea/work/openvino_notebooks/notebooks/236-stable-diffusion-v2/implementation/ov_stable_diffusion_pipeline.py:10: FutureWarning: Importing DiffusionPipeline or ImagePipelineOutput from diffusers.pipeline_utils is deprecated. Please import from diffusers.pipelines.pipeline_utils instead.
  from diffusers.pipeline_utils import DiffusionPipeline
ステップ 3.3: ext-to-Image 生成を実行
ここで、画像生成用のテキストプロンプトをいくつか定義し、推論パイプラインを実行してみましょう。
潜在状態の初期化とステップ数に対するランダム・ジェネレーターのシード値を変更することもできます (ステップ数が多いほど、結果の精度が高くなります)。
プロンプトの例:
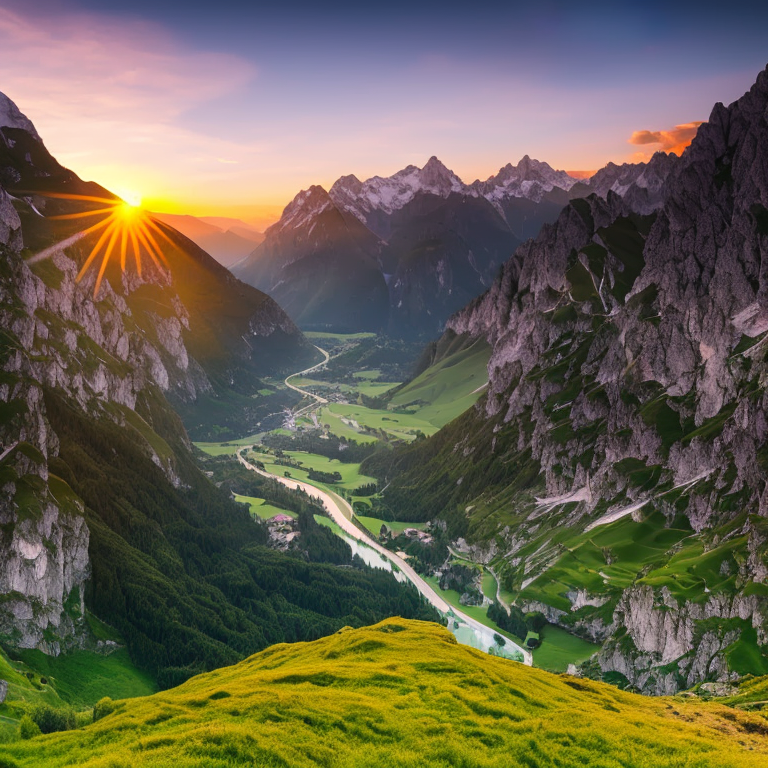
“夕暮れのアルプスの谷、壮大な景色、美しい風景、4k、8k”
“サイボーグでいっぱいの街、モダン、工業、4K、8K”
画像生成の品質を向上させるため、否定プロンプトを使用できます。肯定プロンプトは、それに関連付けられた画像への拡散を誘導しますが、否定プロンプトは、生成画像に対して望ましくない概念を宣言します。例えば、カラフルで明るい画像が必要な場合は、グレースケールの画像が結果として生成されるのを避けたいものです。この場合、グレースケールは否定プロンプトとして扱うことができます。肯定プロンプトと否定プロンプトは同等です。両方しようすることも、どちらか一方だけを使用することもできます。動作の仕組みの詳細については、この記事を参照してください。
import ipywidgets as widgets

text_prompt = widgets.Textarea(value="valley in the Alps at sunset, epic vista, beautiful landscape, 4k, 8k", description='positive prompt', layout=widgets.Layout(width="auto"))
negative_prompt = widgets.Textarea(value="frames, borderline, text, charachter, duplicate, error, out of frame, watermark, low quality, ugly, deformed, blur", description='negative prompt', layout=widgets.Layout(width="auto"))
num_steps = widgets.IntSlider(min=1, max=50, value=25, description='steps:')
seed = widgets.IntSlider(min=0, max=10000000, description='seed: ', value=42)
widgets.VBox([text_prompt, negative_prompt, seed, num_steps])
VBox(children=(Textarea(value='valley in the Alps at sunset, epic vista, beautiful landscape, 4k, 8k', descrip…
# Run inference pipeline
result = ov_pipe(text_prompt.value, negative_prompt=negative_prompt.value, num_inference_steps=num_steps.value,
                 seed=seed.value)
0%| | 0/25 [00:00<?, ?it/s]
final_image = result['sample'][0]
final_image.save('result.png')
final_image