OpenVINO™ による単一画像の超解像度化
この Jupyter ノートブックはオンラインで起動でき、ブラウザーのウィンドウで対話型環境を開きます。ローカルにインストールすることもできます。次のオプションのいずれかを選択します。


超解像とは、ディープラーニングを使用して画素数を増やし、画像の品質を向上させるプロセスです。このノートブックでは、低解像度の画像を 1 枚だけ取得するシングル・イメージ・スーパー・レゾリューション (SISR) について説明します。Open Model Zoo で入手可能な single-image-super-resolution-1032 モデルを使用します。これは、以下に引用した研究論文に基づいています。
Y. Liu et al., “An Attention-Based Approach for Single Image Super Resolution,” 2018 24th International Conference on Pattern Recognition (ICPR), 2018, pp. 2777-2784, doi: 10.1109/ICPR.2018.8545760。
目次
準備
要件をインストール
%pip install -q "openvino>=2023.1.0"
%pip install -q opencv-python
%pip install -q pillow matplotlib
Note: you may need to restart the kernel to use updated packages.
Note: you may need to restart the kernel to use updated packages.
Note: you may need to restart the kernel to use updated packages.
インポート
import os
import time
from pathlib import Path

import cv2
import matplotlib.pyplot as plt
import numpy as np
from IPython.display import HTML, FileLink
from IPython.display import Image as DisplayImage
from IPython.display import Pretty, ProgressBar, clear_output, display
from PIL import Image
import openvino as ov
# Define a download file helper function
def download_file(url: str, path: Path) -> None:
    """Download file."""
    import urllib.request
    path.parent.mkdir(parents=True, exist_ok=True)
    urllib.request.urlretrieve(url, path)
設定
推論デバイスの選択
OpenVINO を使用して推論を実行するためにドロップダウン・リストからデバイスを選択します。
import ipywidgets as widgets

core = ov.Core()
device = widgets.Dropdown(
    options=core.available_devices + ["AUTO"],
    value='AUTO',
    description='Device:',
    disabled=False,
)

device
Dropdown(description='Device:', index=1, options=('CPU', 'AUTO'), value='AUTO')
# 1032: 4x superresolution, 1033: 3x superresolution
model_name = 'single-image-super-resolution-1032'

base_model_dir = Path("./model").expanduser()

model_xml_name = f'{model_name}.xml'
model_bin_name = f'{model_name}.bin'

model_xml_path = base_model_dir / model_xml_name
model_bin_path = base_model_dir / model_bin_name

if not model_xml_path.exists():
    base_url = f'https://storage.openvinotoolkit.org/repositories/open_model_zoo/2023.0/models_bin/1/{model_name}/FP16/'
    model_xml_url = base_url + model_xml_name
    model_bin_url = base_url + model_bin_name

    download_file(model_xml_url, model_xml_path)
    download_file(model_bin_url, model_bin_path)
else:
    print(f'{model_name} already downloaded to {base_model_dir}')
def write_text_on_image(image: np.ndarray, text: str) -> np.ndarray:
    """
    Write the specified text in the top left corner of the image
    as white text with a black border.

    :param image: image as numpy arry with HWC shape, RGB or BGR
    :param text: text to write
    :return: image with written text, as numpy array
    """
    font = cv2.FONT_HERSHEY_PLAIN
    org = (20, 20)
    font_scale = 4
    font_color = (255, 255, 255)
    line_type = 1
    font_thickness = 2
    text_color_bg = (0, 0, 0)
    x, y = org

    image = cv2.UMat(image)
    (text_w, text_h), _ = cv2.getTextSize(text, font, font_scale, font_thickness)
    result_im = cv2.rectangle(image, org, (x + text_w, y + text_h), text_color_bg, -1)

    textim = cv2.putText(
        result_im,
        text,
        (x, y + text_h + font_scale - 1),
        font,
        font_scale,
        font_color,
        font_thickness,
        line_type,
    )
    return textim.get()


def convert_result_to_image(result) -> np.ndarray:
    """
    Convert network result of floating point numbers to image with integer
    values from 0-255. Values outside this range are clipped to 0 and 255.

    :param result: a single superresolution network result in N,C,H,W shape
    """
    result = result.squeeze(0).transpose(1, 2, 0)
    result *= 255
    result[result < 0] = 0
    result[result > 255] = 255
    result = result.astype(np.uint8)
    return result


def to_rgb(image_data) -> np.ndarray:
    """
    Convert image_data from BGR to RGB
    """
    return cv2.cvtColor(image_data, cv2.COLOR_BGR2RGB)
超解像度モデルをロード
超解像度モデルは、入力イメージと、ターゲットサイズ 1920x1080 への入力イメージのバイキュービック補間という 2 つの入力を想定しています。1920x1800 の超解像度バージョンの画像を返します (デフォルトの超解像モデル (1032) の場合)。
core.read_model を使用して OpenVINO ランタイムにモデルをロードし、core.compile_model を使用して指定されたデバイス用にコンパイルし、ネットワークの入力と出力に関する情報を取得します。
core = ov.Core()
model = core.read_model(model=model_xml_path)
compiled_model = core.compile_model(model=model, device_name=device.value)

# Network inputs and outputs are dictionaries. Get the keys for the
# dictionaries.
original_image_key, bicubic_image_key = compiled_model.inputs
output_key = compiled_model.output(0)

# Get the expected input and target shape. The `.dims[2:]` returns the height
# and width. The `resize` function of OpenCV expects the shape as (width, height),
# so reverse the shape with `[::-1]` and convert it to a tuple.
input_height, input_width = list(original_image_key.shape)[2:]
target_height, target_width = list(bicubic_image_key.shape)[2:]

upsample_factor = int(target_height / input_height)

print(f"The network expects inputs with a width of {input_width}, " f"height of {input_height}")
print(f"The network returns images with a width of {target_width}, " f"height of {target_height}")

print(
    f"The image sides are upsampled by a factor of {upsample_factor}. "
    f"The new image is {upsample_factor**2} times as large as the "
    "original image"
)
The network expects inputs with a width of 480, height of 270
The network returns images with a width of 1920, height of 1080
The image sides are upsampled by a factor of 4. The new image is 16 times as large as the original image
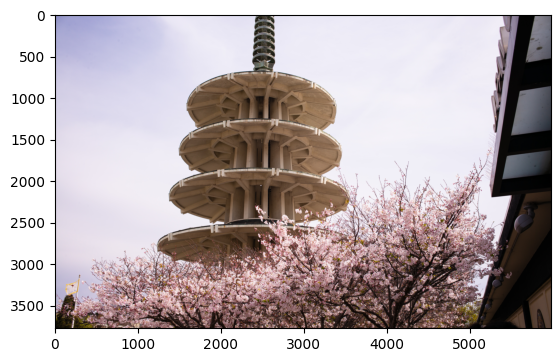
入力画像を読み込んで表示
注: 最良の結果を得るには、生の画像 (
TIFF、BMP、PNGなど) を使用します。圧縮された画像 (JPEGなど) は、超解像度モデルで処理すると歪んで見える場合があります。
IMAGE_PATH = Path("./data/tower.jpg")
OUTPUT_PATH = Path("output/")

os.makedirs(str(OUTPUT_PATH), exist_ok=True)

download_file('https://storage.openvinotoolkit.org/repositories/openvino_notebooks/data/data/image/tower.jpg', IMAGE_PATH)
full_image = cv2.imread(str(IMAGE_PATH))

# Uncomment these lines to load a raw image as BGR.
# import rawpy
# with rawpy.imread(IMAGE_PATH) as raw:
#     full_image = raw.postprocess()[:,:,(2,1,0)]

plt.imshow(to_rgb(full_image))
print(f"Showing full image with width {full_image.shape[1]} " f"and height {full_image.shape[0]}")
Showing full image with width 5976 and height 3770
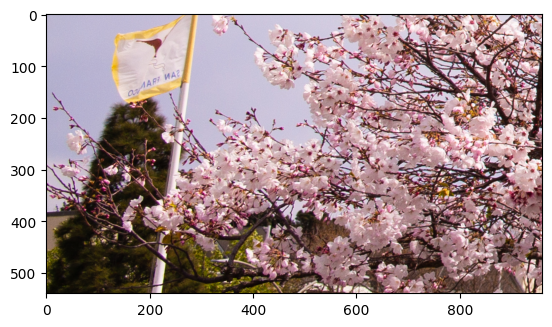
画像の切り抜き部分の超解像化
入力画像を一度切り取ります。
ネットワーク入力サイズを切り取ります。切り抜き部分の左上隅の X (幅) と Y (高さ) 座標を指定します。CROP_FACTOR 変数を 2 に設定すると、ネットワーク入力サイズよりも大きい切り抜きが作成されます (これは、single-image-super-resolution-1032 モデルでのみ機能します)。切り抜きはネットワークに伝播する前にダウンサンプリングされます。これは、ネットワーク入力サイズの切り抜きが小さすぎて十分な情報を表示できない高解像度の画像に役立ちます。結果を改善することもできます。CROP_FACTOR が 1 または 2 の場合、純粋なアップサンプリング係数は半分になることに注意してください。超解像ネットワークが画像の辺の長さを 4 倍にすると、480 x 270 のクロップが 1920 x 1080 にアップサンプリングされます。CROP_FACTOR が 2 の場合、960x540 のクロップは同じ 1920x1080 にアップサンプリングされます。つまり、辺の長さはクロップサイズの 2 倍になります。
# Set `CROP_FACTOR` to 2 to crop with twice the input width and height
# This only works with the 1032 (4x) superresolution model!
# Set it to 1 to crop the image with the exact input size.
CROP_FACTOR = 2
adjusted_upsample_factor = upsample_factor // CROP_FACTOR

image_id = "flag"  # A tag to recognize the saved images.
starty = 3200
startx = 0

# Perform the crop.
image_crop = full_image[
    starty : starty + input_height * CROP_FACTOR,
    startx : startx + input_width * CROP_FACTOR,
]

# Show the cropped image.
print(f"Showing image crop with width {image_crop.shape[1]} and " f"height {image_crop.shape[0]}.")
plt.imshow(to_rgb(image_crop));
Showing image crop with width 960 and height 540.
モデル入力のトリミングの形状変更/サイズ変更
入力画像はネットワークの入力サイズに合わせてサイズ変更され、(N,C,H,W) に再形成されます (N = 画像数、C = チャネル数、H = 高さ、W = 幅)。画像は、バイキュービック補間を使用してネットワークの出力サイズに合わせてサイズ変更されます。このバイキュービック画像はネットワークへの 2 番目の入力です。
# Resize the image to the target shape with bicubic interpolation.
bicubic_image = cv2.resize(
    src=image_crop, dsize=(target_width, target_height), interpolation=cv2.INTER_CUBIC
)

# If required, resize the image to the input image shape.
if CROP_FACTOR > 1:
    image_crop = cv2.resize(src=image_crop, dsize=(input_width, input_height))

# Reshape the images from (H,W,C) to (N,C,H,W).
input_image_original = np.expand_dims(image_crop.transpose(2, 0, 1), axis=0)
input_image_bicubic = np.expand_dims(bicubic_image.transpose(2, 0, 1), axis=0)
推論の実行
推論を行い、推論結果を RGB 画像に変換します。
result = compiled_model(
    {
        original_image_key.any_name: input_image_original,
        bicubic_image_key.any_name: input_image_bicubic,
    }
)[output_key]

# Get inference result as numpy array and reshape to image shape and data type
result_image = convert_result_to_image(result)
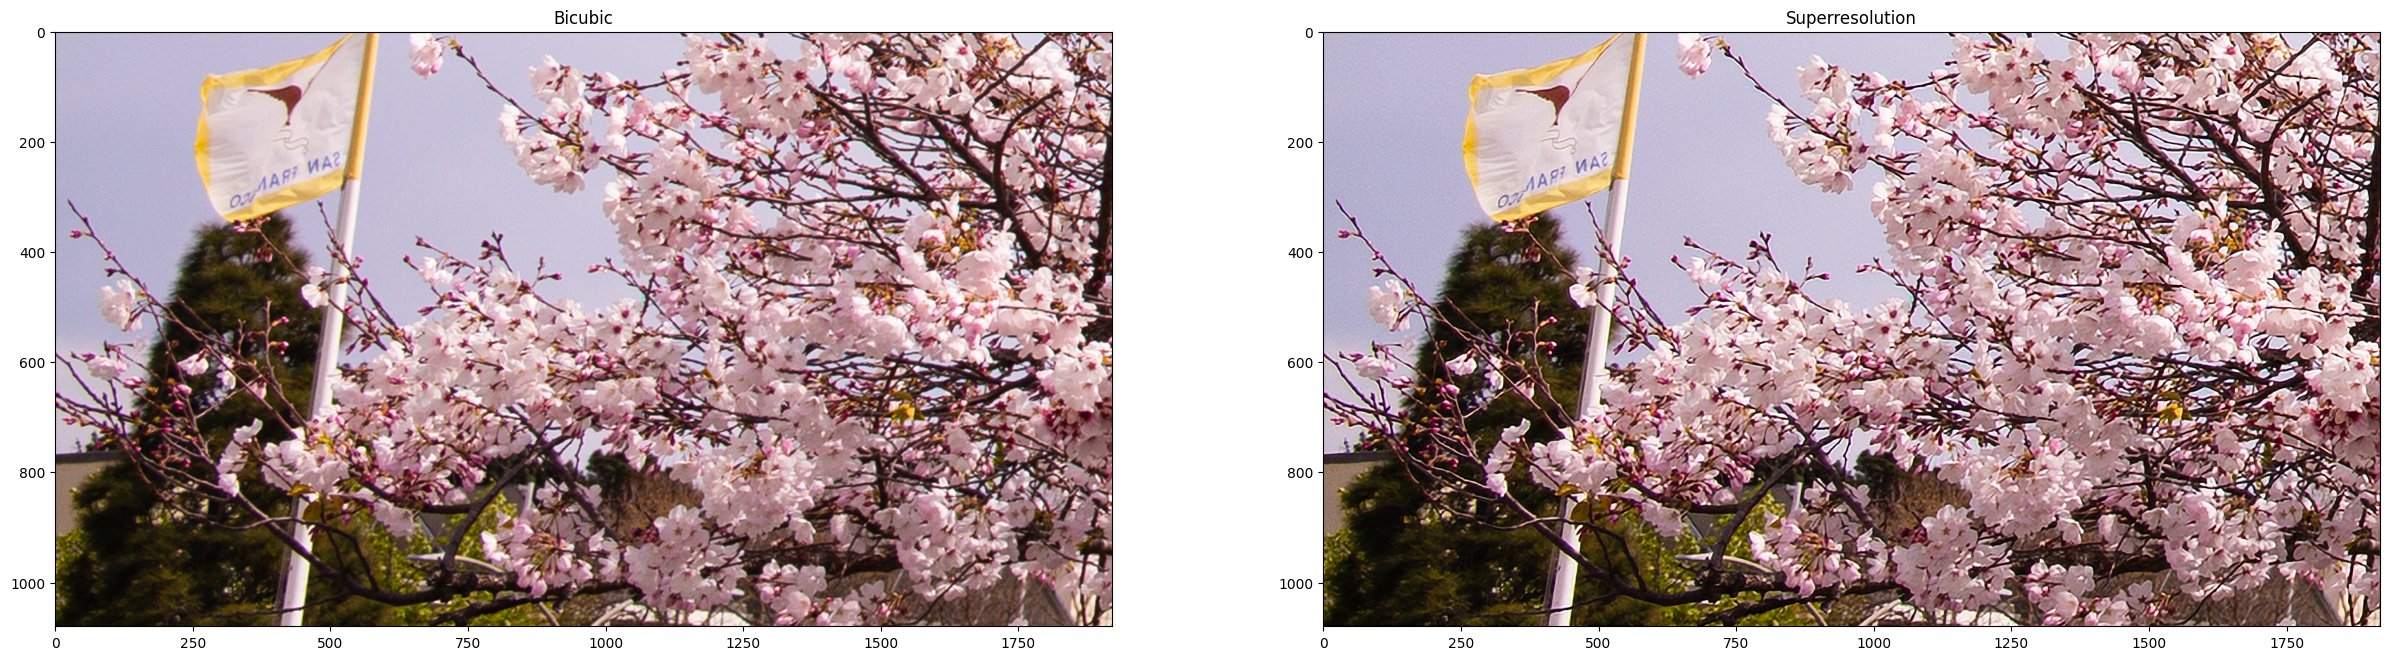
結果を表示して保存
バイキュービック画像と強化された超解像度画像を表示します。
fig, ax = plt.subplots(nrows=1, ncols=2, figsize=(30, 15))
ax[0].imshow(to_rgb(bicubic_image))
ax[1].imshow(to_rgb(result_image))
ax[0].set_title("Bicubic")
ax[1].set_title("Superresolution")
Text(0.5, 1.0, 'Superresolution')
超解像度とバイキュービック画像の切り抜きを保存
# Add a text with "SUPER" or "BICUBIC" to the superresolution or bicubic image.
image_super = write_text_on_image(image=result_image, text="SUPER")
image_bicubic = write_text_on_image(image=bicubic_image, text="BICUBIC")

# Store the image and the results.
crop_image_path = Path(f"{OUTPUT_PATH.stem}/{image_id}_{adjusted_upsample_factor}x_crop.png")
superres_image_path = Path(
    f"{OUTPUT_PATH.stem}/{image_id}_{adjusted_upsample_factor}x_crop_superres.png"
)
bicubic_image_path = Path(
    f"{OUTPUT_PATH.stem}/{image_id}_{adjusted_upsample_factor}x_crop_bicubic.png"
)
cv2.imwrite(filename=str(crop_image_path), img=image_crop, params=[cv2.IMWRITE_PNG_COMPRESSION, 0])
cv2.imwrite(
    filename=str(superres_image_path), img=image_super, params=[cv2.IMWRITE_PNG_COMPRESSION, 0]
)
cv2.imwrite(
    filename=str(bicubic_image_path), img=image_bicubic, params=[cv2.IMWRITE_PNG_COMPRESSION, 0]
)
print(f"Images written to directory: {OUTPUT_PATH}")
Images written to directory: output
バイキュービック/超解像度の比較によるアニメーション GIF の書き出し
print(image_bicubic.shape)
print(image_super.shape)

result_pil = Image.fromarray(to_rgb(image_super))
bicubic_pil = Image.fromarray(to_rgb(image_bicubic))
gif_image_path = Path(f"{OUTPUT_PATH.stem}/{image_id}_comparison_{adjusted_upsample_factor}x.gif")

result_pil.save(
    fp=str(gif_image_path),
    format="GIF",
    append_images=[bicubic_pil],
    save_all=True,
    duration=1000,
    loop=0,
)

# The `DisplayImage(str(gif_image_path))` function does not work in Colab.
DisplayImage(data=open(gif_image_path, "rb").read(), width=1920 // 2)
(1080, 1920, 3)
(1080, 1920, 3)
スライディング・バイキュービック/超解像度の比較ビデオを作成
これには時間がかかる場合があります。ビデオの場合、処理速度を向上させるため、超解像およびバイキュービック画像のサイズが 2 倍に変更されます。これは超解像効果の指標となります。ビデオは .avi ファイルとして保存されます。リンクをクリックしてビデオをダウンロードすることも、output/ ディレクトリーから直接開いてローカルで再生することができます。
注: Google Colab で例を実行する場合は、Files ツールを使用してビデオファイルをダウンロードします。
FOURCC = cv2.VideoWriter_fourcc(*"MJPG")

result_video_path = Path(
    f"{OUTPUT_PATH.stem}/{image_id}_crop_comparison_{adjusted_upsample_factor}x.avi"
)
video_target_height, video_target_width = (
    result_image.shape[0] // 2,
    result_image.shape[1] // 2,
)

out_video = cv2.VideoWriter(
    filename=str(result_video_path),
    fourcc=FOURCC,
    fps=90,
    frameSize=(video_target_width, video_target_height),
)

resized_result_image = cv2.resize(src=result_image, dsize=(video_target_width, video_target_height))
resized_bicubic_image = cv2.resize(
    src=bicubic_image, dsize=(video_target_width, video_target_height)
)

progress_bar = ProgressBar(total=video_target_width)
progress_bar.display()

for i in range(video_target_width):
    # Create a frame where the left part (until i pixels width) contains the
    # superresolution image, and the right part (from i pixels width) contains
    # the bicubic image.
    comparison_frame = np.hstack(
        (
            resized_result_image[:, :i, :],
            resized_bicubic_image[:, i:, :],
        )
    )
    # Create a small black border line between the superresolution
    # and bicubic part of the image.
    comparison_frame[:, i - 1 : i + 1, :] = 0
    out_video.write(image=comparison_frame)
    progress_bar.progress = i
    progress_bar.update()
out_video.release()
clear_output()

video_link = FileLink(result_video_path)
video_link.html_link_str = "<a href='%s' download>%s</a>"
display(HTML(f"The video has been saved to {video_link._repr_html_()}"))
フル入力画像の超解像化
フルイメージの超解像度は、イメージを同じサイズのパッチに分割し、各パスで超解像度を実行してから、結果のパッチを再度つなぎ合わせることによって行われます。このデモでは、画像の境界付近のパッチは無視されます。
境界効果が見られる場合、次のセルの CROPLINES 設定を調整します。
パッチを計算
# Set the number of lines to crop from the network result to prevent
# boundary effects. The value of `CROPLINES` should be an integer >= 1.
CROPLINES = 10
# See Superresolution on one crop of the image for description of `CROP_FACTOR`.
CROP_FACTOR = 2

full_image_height, full_image_width = full_image.shape[:2]

# Compute x and y coordinates of left top of image tiles.
x_coords = list(range(0, full_image_width, input_width * CROP_FACTOR - CROPLINES * 2))
while full_image_width - x_coords[-1] < input_width * CROP_FACTOR:
    x_coords.pop(-1)
y_coords = list(range(0, full_image_height, input_height * CROP_FACTOR - CROPLINES * 2))
while full_image_height - y_coords[-1] < input_height * CROP_FACTOR:
    y_coords.pop(-1)

# Compute the width and height to crop the full image. The full image is
# cropped at the border to tiles of the input size.
crop_width = x_coords[-1] + input_width * CROP_FACTOR
crop_height = y_coords[-1] + input_height * CROP_FACTOR

# Compute the width and height of the target superresolution image.
new_width = (
    x_coords[-1] * (upsample_factor // CROP_FACTOR)
    + target_width
    - CROPLINES * 2 * (upsample_factor // CROP_FACTOR)
)
new_height = (
    y_coords[-1] * (upsample_factor // CROP_FACTOR)
    + target_height
    - CROPLINES * 2 * (upsample_factor // CROP_FACTOR)
)
print(f"The output image will have a width of {new_width} " f"and a height of {new_height}")
The output image will have a width of 11280 and a height of 7280
推論の実行
以下のコードは、一度に画像の 1 つのパッチを読み取ります。各パッチはネットワーク入力形状に合わせて再形成され、バイキュービック補間によってターゲット形状にアップサンプリングされます。元のイメージとバイキュービック・イメージの両方がネットワークを通じて伝播されます。ネットワークの結果は、(1,3,1920,1080) の形状を持つ、浮動小数点値を含む numpy 配列になります。この配列は、(1080,1920,3) 形状の 8 ビット画像に変換され、full_superresolution_image に書き込まれます。バイキュービック画像は比較のため full_bicubic_image に書き込まれます。プログレスバーにはプロセスの進行状況が表示されます。推論時間と、各パッチを処理する合計時間が測定されます。
start_time = time.perf_counter()
patch_nr = 0
num_patches = len(x_coords) * len(y_coords)
progress_bar = ProgressBar(total=num_patches)
progress_bar.display()

# Crop image to fit tiles of the input size.
full_image_crop = full_image.copy()[:crop_height, :crop_width, :]

# Create an empty array of the target size.
full_superresolution_image = np.empty((new_height, new_width, 3), dtype=np.uint8)

# Create a bicubic upsampled image of the target size for comparison.
full_bicubic_image = cv2.resize(
    src=full_image_crop[CROPLINES:-CROPLINES, CROPLINES:-CROPLINES, :],
    dsize=(new_width, new_height),
    interpolation=cv2.INTER_CUBIC,
)

total_inference_duration = 0
for y in y_coords:
    for x in x_coords:
        patch_nr += 1

        # Crop the input image.
        image_crop = full_image_crop[
            y : y + input_height * CROP_FACTOR,
            x : x + input_width * CROP_FACTOR,
        ]

        # Resize the images to the target shape with bicubic interpolation
        bicubic_image = cv2.resize(
            src=image_crop,
            dsize=(target_width, target_height),
            interpolation=cv2.INTER_CUBIC,
        )

        if CROP_FACTOR > 1:
            image_crop = cv2.resize(src=image_crop, dsize=(input_width, input_height))

        input_image_original = np.expand_dims(image_crop.transpose(2, 0, 1), axis=0)

        input_image_bicubic = np.expand_dims(bicubic_image.transpose(2, 0, 1), axis=0)

        # Do inference.
        inference_start_time = time.perf_counter()

        result = compiled_model(
            {
                original_image_key.any_name: input_image_original,
                bicubic_image_key.any_name: input_image_bicubic,
            }
        )[output_key]

        inference_stop_time = time.perf_counter()
        inference_duration = inference_stop_time - inference_start_time
        total_inference_duration += inference_duration

        # Reshape an inference result to the image shape and the data type.
        result_image = convert_result_to_image(result)

        # Add the inference result of this patch to the full superresolution
        # image.
        adjusted_upsample_factor = upsample_factor // CROP_FACTOR
        new_y = y * adjusted_upsample_factor
        new_x = x * adjusted_upsample_factor
        full_superresolution_image[
            new_y : new_y + target_height - CROPLINES * adjusted_upsample_factor * 2,
            new_x : new_x + target_width - CROPLINES * adjusted_upsample_factor * 2,
        ] = result_image[
            CROPLINES * adjusted_upsample_factor : -CROPLINES * adjusted_upsample_factor,
            CROPLINES * adjusted_upsample_factor : -CROPLINES * adjusted_upsample_factor,
            :,
        ]

        progress_bar.progress = patch_nr
        progress_bar.update()

        if patch_nr % 10 == 0:
            clear_output(wait=True)
            progress_bar.display()
            display(
                Pretty(
                    f"Processed patch {patch_nr}/{num_patches}. "
                    f"Inference time: {inference_duration:.2f} seconds "
                    f"({1/inference_duration:.2f} FPS)"
                )
            )

end_time = time.perf_counter()
duration = end_time - start_time
clear_output(wait=True)
print(
    f"Processed {num_patches} patches in {duration:.2f} seconds. "
    f"Total patches per second (including processing): "
    f"{num_patches/duration:.2f}.\nInference patches per second: "
    f"{num_patches/total_inference_duration:.2f} "
)
Processed 42 patches in 4.64 seconds. Total patches per second (including processing): 9.05.
Inference patches per second: 17.92
超解像度とバイキュービック画像を保存
full_superresolution_image_path = Path(
    f"{OUTPUT_PATH.stem}/full_superres_{adjusted_upsample_factor}x.jpg"
)
full_bicubic_image_path = Path(f"{OUTPUT_PATH.stem}/full_bicubic_{adjusted_upsample_factor}x.jpg")

cv2.imwrite(str(full_superresolution_image_path), full_superresolution_image)
cv2.imwrite(str(full_bicubic_image_path), full_bicubic_image);
bicubic_link = FileLink(full_bicubic_image_path)
image_link = FileLink(full_superresolution_image_path)
bicubic_link.html_link_str = "<a href='%s' download>%s</a>"
image_link.html_link_str = "<a href='%s' download>%s</a>"
display(
    HTML(
        "The images are saved in the images directory. You can also download "
        "them by clicking on these links:"
        f"<ul><li>{image_link._repr_html_()}<li>{bicubic_link._repr_html_()}"
    )
)