前処理の最適化
この Jupyter ノートブックはオンラインで起動でき、ブラウザーのウィンドウで対話型環境を開きます。ローカルにインストールすることもできます。次のオプションのいずれかを選択します。


入力データがモデルの入力テンソルに完全に適合しない場合、データをモデルが期待する形式に変換する追加の操作/ステップが必要になります。このチュートリアルでは、前処理 API を使用してこれを実行する方法を説明します。前処理 API は、前処理手順を実行グラフに統合し、選択したデバイスで実行できるようにする使いやすいツールであり、デバイスの使用率を向上させることができます。前処理 AP Iの詳細については、この概要と詳細を参照してください。
このチュートリアルには次の手順が含まれます。
モデルをダウンロードします。
前処理 API を使用して前処理を設定し、モデルをロードして元の画像で推論します。
画像をモデル入力タイプに適合させ、準備した画像で推論します。
1 枚の写真で結果を比較します。
パフォーマンスを比較します。
目次
設定
# Install openvino package
%pip install -q "openvino>=2023.1.0" tensorflow opencv-python matplotlib
Note: you may need to restart the kernel to use updated packages.
インポート
import time
from pathlib import Path

import cv2
import matplotlib.pyplot as plt
import numpy as np
import openvino as ov
import tensorflow as tf

# Fetch `notebook_utils` module
import urllib.request
urllib.request.urlretrieve(
    url='https://raw.githubusercontent.com/openvinotoolkit/openvino_notebooks/main/notebooks/utils/notebook_utils.py',
    filename='notebook_utils.py'
)
from notebook_utils import download_file
2024-02-09 23:03:22.538807: I tensorflow/core/util/port.cc:110] oneDNN custom operations are on. You may see slightly different numerical results due to floating-point round-off errors from different computation orders. To turn them off, set the environment variable TF_ENABLE_ONEDNN_OPTS=0.
2024-02-09 23:03:22.573455: I tensorflow/core/platform/cpu_feature_guard.cc:182] This TensorFlow binary is optimized to use available CPU instructions in performance-critical operations.
To enable the following instructions: AVX2 AVX512F AVX512_VNNI FMA, in other operations, rebuild TensorFlow with the appropriate compiler flags.
2024-02-09 23:03:23.087260: W tensorflow/compiler/tf2tensorrt/utils/py_utils.cc:38] TF-TRT Warning: Could not find TensorRT
イメージとデバイスのセットアップ
# Download the image from the openvino_notebooks storage
image_path = download_file(
    "https://storage.openvinotoolkit.org/repositories/openvino_notebooks/data/data/image/coco.jpg",
    directory="data"
)
image_path = str(image_path)
data/coco.jpg: 0%| | 0.00/202k [00:00<?, ?B/s]
import ipywidgets as widgets

core = ov.Core()
device = widgets.Dropdown(
    options=core.available_devices + ["AUTO"],
    value='AUTO',
    description='Device:',
    disabled=False,
)

device
Dropdown(description='Device:', index=1, options=('CPU', 'AUTO'), value='AUTO')
モデルをダウンロード
このチュートリアルでは InceptionResNetV2 を使用します。InceptionResNetV2 モデルは、画像分類を実行するために設計された Inception ファミリーのモデルの 2 番目のモデルです。他の Inception モデルと同様に、InceptionResNetV2 は ImageNet データセットで事前トレーニングされています。このモデルファミリーの詳細については、研究論文を参照してください。
tf.keras.applications api を使用してモデルをロードし、ディスクに保存します。
model_name = "InceptionResNetV2"

model_dir = Path("model")
model_dir.mkdir(exist_ok=True)

model_path = model_dir / model_name

model = tf.keras.applications.InceptionV3()
model.save(model_path)
2024-02-09 23:03:26.685646: E tensorflow/compiler/xla/stream_executor/cuda/cuda_driver.cc:266] failed call to cuInit: CUDA_ERROR_COMPAT_NOT_SUPPORTED_ON_DEVICE: forward compatibility was attempted on non supported HW
2024-02-09 23:03:26.685683: I tensorflow/compiler/xla/stream_executor/cuda/cuda_diagnostics.cc:168] retrieving CUDA diagnostic information for host: iotg-dev-workstation-07
2024-02-09 23:03:26.685688: I tensorflow/compiler/xla/stream_executor/cuda/cuda_diagnostics.cc:175] hostname: iotg-dev-workstation-07
2024-02-09 23:03:26.685821: I tensorflow/compiler/xla/stream_executor/cuda/cuda_diagnostics.cc:199] libcuda reported version is: 470.223.2
2024-02-09 23:03:26.685836: I tensorflow/compiler/xla/stream_executor/cuda/cuda_diagnostics.cc:203] kernel reported version is: 470.182.3
2024-02-09 23:03:26.685841: E tensorflow/compiler/xla/stream_executor/cuda/cuda_diagnostics.cc:312] kernel version 470.182.3 does not match DSO version 470.223.2 -- cannot find working devices in this configuration
WARNING:tensorflow:Compiled the loaded model, but the compiled metrics have yet to be built. model.compile_metrics will be empty until you train or evaluate the model.
WARNING:absl:Found untraced functions such as _jit_compiled_convolution_op, _jit_compiled_convolution_op, _jit_compiled_convolution_op, _jit_compiled_convolution_op, _jit_compiled_convolution_op while saving (showing 5 of 94). These functions will not be directly callable after loading.
INFO:tensorflow:Assets written to: model/InceptionResNetV2/assets
INFO:tensorflow:Assets written to: model/InceptionResNetV2/assets
コアの作成
core = ov.Core()
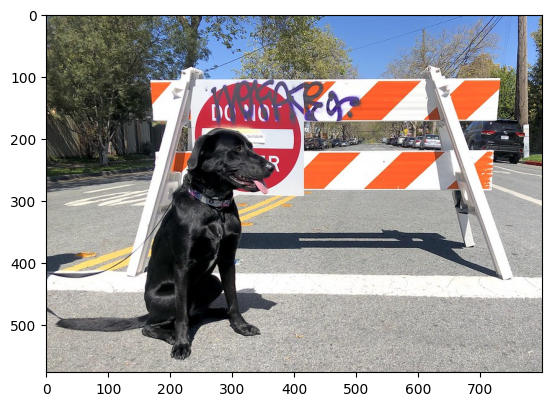
画像の元のパラメーターを確認
image = cv2.imread(image_path)
plt.imshow(cv2.cvtColor(image, cv2.COLOR_BGR2RGB));
print(f"The original shape of the image is {image.shape}")
print(f"The original data type of the image is {image.dtype}")
The original shape of the image is (577, 800, 3)
The original data type of the image is uint8
前処理 API を使用して前処理手順を設定し推論を実行
直感的には、前処理 API は次の部分で構成されます。
テンソル - 実際のユーザーのデータから、形状、レイアウト、精度、色の形式などのユーザーデータ形式を宣言します。
ステップ - ユーザーデータに適用する前処理ステップのシーケンスを記述します。
モデル - モデルのデータ形式を指定します。通常、モデルの精度と形状はすでに判明しており、指定できるのはレイアウトなどの追加情報のみです。
モデルのグラフ変更は、モデルがドライブから読み取られた後、実際のデバイスにロードされる前に実行されます。
次の操作の前処理サポートします (詳細については、こちらをご覧ください)。
平均/スケールの正規化
変換精度
レイアウトを変換 (転置)
画像のサイズ変更
カラー変換
カスタム操作
モデル変換 API を使用してモデルを OpenVINO IR に変換
前処理のオプションは必要ありません。
ir_path = model_dir / "ir_model" / f"{model_name}.xml"

ppp_model = None

if ir_path.exists():
    ppp_model = core.read_model(model=ir_path)
    print(f"Model in OpenVINO format already exists: {ir_path}")
else:
    ppp_model = ov.convert_model(model_path,
                                 input=[1,299,299,3])
    ov.save_model(ppp_model, str(ir_path))
PrePostProcessor オブジェクトの生成
PrePostProcessor() クラスを使用すると、モデルの前処理および後処理の手順を指定できます。
from openvino.preprocess import PrePostProcessor

ppp = PrePostProcessor(ppp_model)
ユーザーデータ形式を宣言
モデル/プリプロセッサーの特定の入力を処理するには、PrePostProcessor.input(input_name) メソッドを使用します。モデルに入力が 1 つしかない場合、単純な PrePostProcessor.input() は、この入力 (テンソル、ステップ、モデル) の前処理ビルダーへの参照を取得します。一般に、モデルに複数の入力/出力がある場合、それぞれテンソル名またはそのインデックスによってアドレス指定できます。デフォルトでは、ユーザーの入力テンソルに関する情報は、モデルの入力パラメーターと同じデータ (タイプ/形状など) に初期化されます。ユーザー・アプリケーションは、アプリケーションのデータに応じて特定のパラメーターをオーバーライドできます。オーバーライドのパラメーターの詳細については、このページを参照してください。
以下は、指定されるすべての入力情報です。
精度は
U8(符号なし 8 ビット整数) です。サイズは固定されておらず、1 つの決まった形状サイズの設定は
.set_shape([1, 577, 800, 3])です。レイアウトは
“NHWC”です。例えば、高さ=577、幅=800、チャネル=3 を意味します。
高さと幅はサイズ変更に必要であり、チャネルは平均/スケールの正規化に必要です。
# setup formant of data
ppp.input().tensor().set_element_type(ov.Type.u8)\
                    .set_spatial_dynamic_shape()\
                    .set_layout(ov.Layout('NHWC'))
<openvino._pyopenvino.preprocess.InputTensorInfo at 0x7ff8b271c1b0>
モデルレイアウトの宣言
モデル入力には、精度と形状に関する情報が含まれています。前処理 API はこれらの変更を目的としたものではありません。指定できるのは入力データのレイアウトのみです。
input_layer_ir = next(iter(ppp_model.inputs))
print(f"The input shape of the model is {input_layer_ir.shape}")

ppp.input().model().set_layout(ov.Layout('NHWC'))
The input shape of the model is [1,299,299,3]
<openvino._pyopenvino.preprocess.InputModelInfo at 0x7ff7b1f9dd70>
前処理ステップ
これで、前処理手順のシーケンスを定義できます。前処理手順の詳細については、こちらを参照してください。
以下を実行します。
U8からFP32精度へ変換します。モデルの高さ/幅に合わせてサイズを変更します。モデルが動的なサイズを受け入れる場合、例えば
{?, 3, ?, ?}resize は画像のサイズを変更する方法を認識できないことに注意してください。したがって、この場合はターゲットの高さ/幅を指定する必要があります。詳細については、PreProcessSteps.resize() も参照してください。各チャネルから平均を減算します。
各ピクセルデータを適切なスケール値に分割します。
変換レイアウトを指定する必要はありません。レイアウトが異なる場合は、変換が明示的に追加されます。
from openvino.preprocess import ResizeAlgorithm

ppp.input().preprocess().convert_element_type(ov.Type.f32) \
                        .resize(ResizeAlgorithm.RESIZE_LINEAR)\
                        .mean([127.5,127.5,127.5])\
                        .scale([127.5,127.5,127.5])
<openvino._pyopenvino.preprocess.PreProcessSteps at 0x7ff7b1f9d230>
ステップをモデルに統合
前処理ステップが完了すると、最終モデルを構築できます。デバッグ用途で PrePostProcessor 構成を表示することができます。
print(f'Dump preprocessor: {ppp}')
model_with_preprocess = ppp.build()
Dump preprocessor: Input "input_1":
    User's input tensor: [1,?,?,3], [N,H,W,C], u8
    Model's expected tensor: [1,299,299,3], [N,H,W,C], f32
    Pre-processing steps (4):
      convert type (f32): ([1,?,?,3], [N,H,W,C], u8) -> ([1,?,?,3], [N,H,W,C], f32)
      resize to model width/height: ([1,?,?,3], [N,H,W,C], f32) -> ([1,299,299,3], [N,H,W,C], f32)
      mean (127.5,127.5,127.5): ([1,299,299,3], [N,H,W,C], f32) -> ([1,299,299,3], [N,H,W,C], f32)
      scale (127.5,127.5,127.5): ([1,299,299,3], [N,H,W,C], f32) -> ([1,299,299,3], [N,H,W,C], f32)
モデルをロードして推論を実行
def prepare_image_api_preprocess(image_path, model=None):
    image = cv2.imread(image_path)
    input_tensor = np.expand_dims(image, 0)
    return input_tensor


compiled_model_with_preprocess_api = core.compile_model(model=ppp_model, device_name=device.value)

ppp_output_layer = compiled_model_with_preprocess_api.output(0)

ppp_input_tensor = prepare_image_api_preprocess(image_path)
results = compiled_model_with_preprocess_api(ppp_input_tensor)[ppp_output_layer][0]
画像を手動でフィットさせて推論を実行
モデルのロード
model = core.read_model(model=ir_path)
compiled_model = core.compile_model(model=model, device_name=device.value)
画像をロードしてモデル入力に適合
def manual_image_preprocessing(path_to_image, compiled_model):
    input_layer_ir = next(iter(compiled_model.inputs))

    # N, H, W, C = batch size, height, width, number of channels
    N, H, W, C = input_layer_ir.shape

    # load  image, image will be resized to model input size and converted to RGB
    img = tf.keras.preprocessing.image.load_img(image_path, target_size=(H, W), color_mode='rgb')

    x = tf.keras.preprocessing.image.img_to_array(img)
    x = np.expand_dims(x, axis=0)

    # will scale input pixels between -1 and 1
    input_tensor = tf.keras.applications.inception_resnet_v2.preprocess_input(x)

    return input_tensor


input_tensor = manual_image_preprocessing(image_path, compiled_model)
print(f"The shape of the image is {input_tensor.shape}")
print(f"The data type of the image is {input_tensor.dtype}")
The shape of the image is (1, 299, 299, 3)
The data type of the image is float32
推論を実行
output_layer = compiled_model.output(0)

result = compiled_model(input_tensor)[output_layer]
結果を比較
1 つの画像で結果を比較
def check_results(input_tensor, compiled_model, imagenet_classes):
    output_layer = compiled_model.output(0)

    results = compiled_model(input_tensor)[output_layer][0]

    top_indices = np.argsort(results)[-5:][::-1]
    top_softmax = results[top_indices]

    for index, softmax_probability in zip(top_indices, top_softmax):
        print(f"{imagenet_classes[index]}, {softmax_probability:.5f}")

    return top_indices, top_softmax


# Convert the inference result to a class name.
imagenet_filename = download_file(
    "https://storage.openvinotoolkit.org/repositories/openvino_notebooks/data/data/datasets/imagenet/imagenet_2012.txt",
    directory="data"
)
imagenet_classes = imagenet_filename.read_text().splitlines()
imagenet_classes = ['background'] + imagenet_classes

# get result for inference with preprocessing api
print("Result of inference with Preprocessing API:")
res = check_results(ppp_input_tensor, compiled_model_with_preprocess_api, imagenet_classes)

print("\n")

# get result for inference with the manual preparing of the image
print("Result of inference with manual image setup:")
res = check_results(input_tensor, compiled_model, imagenet_classes)
data/imagenet_2012.txt: 0%| | 0.00/30.9k [00:00<?, ?B/s]
Result of inference with Preprocessing API:
n02099601 golden retriever, 0.80560
n02098413 Lhasa, Lhasa apso, 0.10039
n02108915 French bulldog, 0.01915
n02111129 Leonberg, 0.00825
n02097047 miniature schnauzer, 0.00294


Result of inference with manual image setup:
n02098413 Lhasa, Lhasa apso, 0.76843
n02099601 golden retriever, 0.19322
n02111129 Leonberg, 0.00720
n02097047 miniature schnauzer, 0.00287
n02100877 Irish setter, red setter, 0.00115
パフォーマンスを比較
def check_performance(compiled_model, preprocessing_function=None):
    num_images = 1000

    start = time.perf_counter()

    for _ in range(num_images):
        input_tensor = preprocessing_function(image_path, compiled_model)
        compiled_model(input_tensor)

    end = time.perf_counter()
    time_ir = end - start

    return time_ir, num_images

time_ir, num_images = check_performance(compiled_model, manual_image_preprocessing)
print(
    f"IR model in OpenVINO Runtime/CPU with manual image preprocessing: {time_ir/num_images:.4f} "
    f"seconds per image, FPS: {num_images/time_ir:.2f}"
)

time_ir, num_images = check_performance(compiled_model_with_preprocess_api, prepare_image_api_preprocess)
print(
    f"IR model in OpenVINO Runtime/CPU with preprocessing API: {time_ir/num_images:.4f} "
    f"seconds per image, FPS: {num_images/time_ir:.2f}"
)
IR model in OpenVINO Runtime/CPU with manual image preprocessing: 0.0153 seconds per image, FPS: 65.53
IR model in OpenVINO Runtime/CPU with preprocessing API: 0.0183 seconds per image, FPS: 54.77