MediaPipe Iris デモ#
このガイドでは、OVMS を使用して MediaPipe グラフを実装する方法を説明します。
Mediapipe::ImageFrame を入力として受け入れるグラフの使用例:
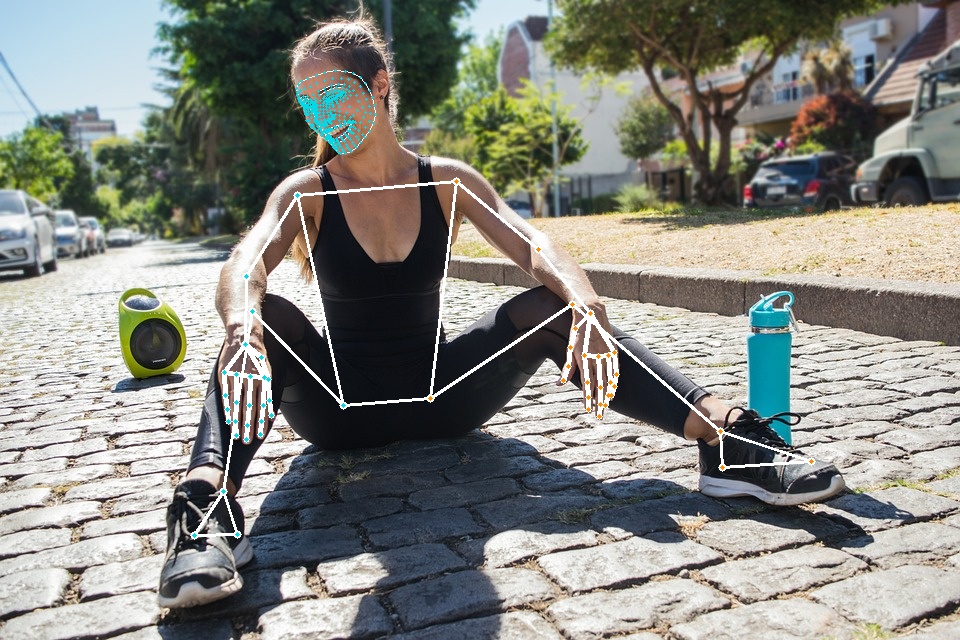
デモは Mediapipe Iris demo をベースにしています。
サーバーのデプロイを準備#
リポジトリーのクローンを作成し、メディアパイプの object_detection ディレクトリー移動します。
git clone https://github.com/openvinotoolkit/model_server.git
cd model_server/demos/mediapipe/iris_tracking

./prepare_server.sh最新モデルのサーバーイメージをプル#
OpenVINO™ モデルサーバーの最新バージョンを Docker Hub から取得します:
docker pull openvino/model_server:latestOpenVINO™ モデルサーバーの実行#
docker run -d -v $PWD/mediapipe:/mediapipe -v $PWD/ovms:/models -p 9000:9000
openvino/model_server:latest --config_path /models/config_iris.json --port 9000虹彩追跡用のクライアント・アプリケーションを実行#
pip install -r requirements.txt
# download a sample image for analysis
wget https://raw.githubusercontent.com/openvinotoolkit/model_server/releases/2024/3/demos/common/static/images/people/people2.jpeg
echo "people2.jpeg" > input_images.txt
# launch the client
python mediapipe_iris_tracking.py --grpc_port 9000 --images_list input_images.txt
Running demo application.Start processing:
        Graph name: irisTracking
(800, 1200, 3)
Iteration 0; Processing time: 44.73 ms; speed 22.36 fps
Results saved to :image_0.jpgイメージを出力#