セグメント化モデルを量子化してライブ推論を表示#
この Jupyter ノートブックは、ローカルへのインストール後にのみ起動できます。
PyTorch Lightning と OpenVINO™ による腎臓のセグメント化 - パート 3#
このチュートリアルは、医療セグメント化モデルのトレーニング、最適化、量子化、ライブ推論の表示方法に関するシリーズの一部です。目標は、腎臓のセグメント化モデルの推論を加速することです。UNet モデルはスクラッチからトレーニングされており、データは Kits19 から取得されています。
シリーズの 3 番目のチュートリアルでは、次の方法を説明します:
モデル・トランスフォーメーション API を使用して元のモデルを OpenVINO IR に変換します。
NNCF を使用して PyTorch モデルを量子化します。
元のモデルと量子化されたモデルの F1 スコアメトリックを評価します。
FP32 モデルと INT8 量子化モデルのベンチマーク・パフォーマンスを測定します。
OpenVINO の非同期 API を使用したライブ推論を表示します。
このシリーズのすべてのノートブック:
セグメント化モデルを変換および量子化してライブ推論を表示 (このノートブック)
手順#
このノートブックではトレーニングされた UNet モデルが必要です。完全な Kits-19 フレーム・データセットを使用して 20 エポックでトレーニングされた事前トレーニング済みモデルを提供します。このモデルの検証セットでの F1 スコアは 0.9 です。トレーニング・コードはノートブックで入手できます。
PyTorch モデルの NNCF には C++ コンパイラーが必要です。Windows* では、Microsoft Visual Studio* 2019 をインストールします。インストール中に、[ワークロード] タブで [C++ によるデスクトップ開発] を選択します。macOS* では、ターミナルから xcode-select –install を実行します。Linux* の場合は、gcc をインストールします。
完全なデータセットを使用してこのノートブックを実行すると、時間がかかります。デモでは、変換された CT スキャンを 1 つダウンロードし、そのスキャンを量子化と推論に使用します。運用では、モデルの定量化に代表的なデータセットを使用します。
目次:
import platform

%pip install -q "openvino>=2023.3.0" "monai>=0.9.1" "torchmetrics>=0.11.0" "nncf>=2.8.0" "opencv-python" torch tqdm --extra-index-url https://download.pytorch.org/whl/cpu

if platform.system() != "Windows":
     %pip install -q "matplotlib>=3.4"
else:
%pip install -q "matplotlib>=3.4,<3.7"Note: you may need to restart the kernel to use updated packages.
Note: you may need to restart the kernel to use updated packages.インポート#
import logging
import os
import random
import time
import warnings
import zipfile
from pathlib import Path
from typing import Union

warnings.filterwarnings("ignore", category=UserWarning)

import cv2
import matplotlib.pyplot as plt
import monai
import numpy as np
import torch
import nncf
import openvino as ov
from monai.transforms import LoadImage
from nncf.common.logging.logger import set_log_level
from torchmetrics import F1Score as F1
import requests

set_log_level(logging.ERROR) # Disables all NNCF info and warning messages

# `notebook_utils` モジュールを取得
r =
requests.get(url="https://raw.githubusercontent.com/openvinotoolkit/openvino_notebooks/latest/utils/notebook_utils.py")
open("notebook_utils.py", "w").write(r.text)
from notebook_utils import download_file

if not Path("./custom_segmentation.py").exists():
    download_file(url="https://raw.githubusercontent.com/openvinotoolkit/openvino_notebooks/latest/notebooks/ct-segmentation-quantize/custom_segmentation.py")
from custom_segmentation import SegmentationModel

if not Path("./async_pipeline.py").exists():
    download_file(url="https://raw.githubusercontent.com/openvinotoolkit/openvino_notebooks/latest/notebooks/ct-segmentation-quantize/async_pipeline.py")
from async_pipeline import show_live_inference
2024-07-12 23:48:24.140201: I tensorflow/core/util/port.cc:110] oneDNN custom operations are on.You may see slightly different numerical results due to floating-point round-off errors from different computation orders.To turn them off, set the environment variable TF_ENABLE_ONEDNN_OPTS=0. 2024-07-12 23:48:24.175655: I tensorflow/core/platform/cpu_feature_guard.cc:182] This TensorFlow binary is optimized to use available CPU instructions in performance-critical operations.To enable the following instructions: AVX2 AVX512F AVX512_VNNI FMA, in other operations, rebuild TensorFlow with the appropriate compiler flags. 2024-07-12 23:48:24.759330: W tensorflow/compiler/tf2tensorrt/utils/py_utils.cc:38] TF-TRT Warning: Could not find TensorRT
INFO:nncf:NNCF initialized successfully.Supported frameworks detected: torch, tensorflow, onnx, openvino設定#
デフォルトでは、このノートブックは量子化に使用される CT スキャンを KITS19 データセットからダウンロードします。
BASEDIR = Path("kits19_frames_1")
# データ準備のノートブックで用意された完全なデータセットを使用するには、以下の行のコメントを解除します
# BASEDIR = Path("~/kits19/kits19_frames").expanduser()
MODEL_DIR = Path("model")
MODEL_DIR.mkdir(exist_ok=True)
PyTorch モデルのロード#
事前トレーニングされたモデルの重みをダウンロードし、PyTorch モデルとトレーニング後に保存された state_dict をロードします。このノートブックで使用されているモデルは、MONAI の BasicUNet モデルです。事前トレーニングされたチェックポイントを提供します。このモデルがどのように実行されるか確認するには、トレーニング・ノートブックを参照してください。
state_dict_url = "https://storage.openvinotoolkit.org/repositories/openvino_notebooks/models/kidney-segmentation-kits19/unet_kits19_state_dict.pth"
state_dict_file = download_file(state_dict_url, directory="pretrained_model")
state_dict = torch.load(state_dict_file, map_location=torch.device("cpu"))

new_state_dict = {}
for k, v in state_dict.items():
    new_key = k.replace("_model.", "")
    new_state_dict[new_key] = v
new_state_dict.pop("loss_function.pos_weight")

model = monai.networks.nets.BasicUNet(spatial_dims=2, in_channels=1, out_channels=1).eval()
model.load_state_dict(new_state_dict)
pretrained_model/unet_kits19_state_dict.pth: 0%| | 0.00/7.58M [00:00<?, ?B/s]BasicUNet features: (32, 32, 64, 128, 256, 32).<All keys matched successfully>CT スキャンデータのダウンロード#
# CT スキャンの症例番号。例: 2 は case_00002 ディレクトリーのデータ
# 現在サポートされているのは 117 のみです
CASE = 117
if not (BASEDIR / f"case_{CASE:05d}").exists():
    BASEDIR.mkdir(exist_ok=True)
    filename =
download_file(f"https://storage.openvinotoolkit.org/data/test_data/openvino_notebooks/kits19/case_{CASE:05d}.zip")
    with zipfile.ZipFile(filename, "r") as zip_ref:
        zip_ref.extractall(path=BASEDIR)
    os.remove(filename) # zipfile を削除
    print(f"Downloaded and extracted data for case_{CASE:05d}")
else:
    print(f"Data for case_{CASE:05d} exists")
case_00117.zip: 0%| | 0.00/5.48M [00:00<?, ?B/s]Downloaded and extracted data for case_00117設定#
データセット#
次のセルの KitsDataset クラスは、画像とマスクが患者ごとのフォルダー以下の ``basedir`` ディレクトリーにあると想定しています。これは、トレーニング・ノートブックの Dataset クラスの簡易バージョンです。
画像は、トレーニング・ノートブックの画像読み込み方法に合わせて、MONAI の LoadImage を使用して読み込まれます。このメソッドは画像を回転および反転します。画像を予想される向きで表示するため、rotate_and_flip メソッドを定義します:
def rotate_and_flip(image):
    """Rotate `image` by 90 degrees and flip horizontally"""
    return cv2.flip(cv2.rotate(image, rotateCode=cv2.ROTATE_90_CLOCKWISE), flipCode=1)

class KitsDataset:
    def __init__(self, basedir: str):
        """
        Dataset class for prepared Kits19 data, for binary segmentation (background/kidney)
        Source data should exist in basedir, in subdirectories case_00000 until case_00210,
        with each subdirectory containing directories imaging_frames, with jpg images, and
        segmentation_frames with segmentation masks as png files.
        See [data-preparation-ct-scan](./data-preparation-ct-scan.ipynb)

        :param basedir: Directory that contains the prepared CT scans
        """
        masks = sorted(BASEDIR.glob("case_*/segmentation_frames/*png"))

        self.basedir = basedir
        self.dataset = masks
        print(f"Created dataset with {len(self.dataset)} items." f"Base directory for data: {basedir}")

    def __getitem__(self, index):
        """
        Get an item from the dataset at the specified index.

        :return: (image, segmentation_mask)
        """
        mask_path = self.dataset[index]
        image_path = str(mask_path.with_suffix(".jpg")).replace("segmentation_frames", "imaging_frames")

        # トレーニング・ノートブックのデータの読み込みに合わせて、MONAI の LoadImage を使用して画像を読み込み
        mask = LoadImage(image_only=True, dtype=np.uint8)(str(mask_path)).numpy()
        img = LoadImage(image_only=True, dtype=np.float32)(str(image_path)).numpy()

        if img.shape[:2] != (512, 512):
            img = cv2.resize(img.astype(np.uint8), (512, 512)).astype(np.float32)
            mask = cv2.resize(mask, (512, 512))

        input_image = np.expand_dims(img, axis=0)
        return input_image, mask

    def __len__(self):
        return len(self.dataset)
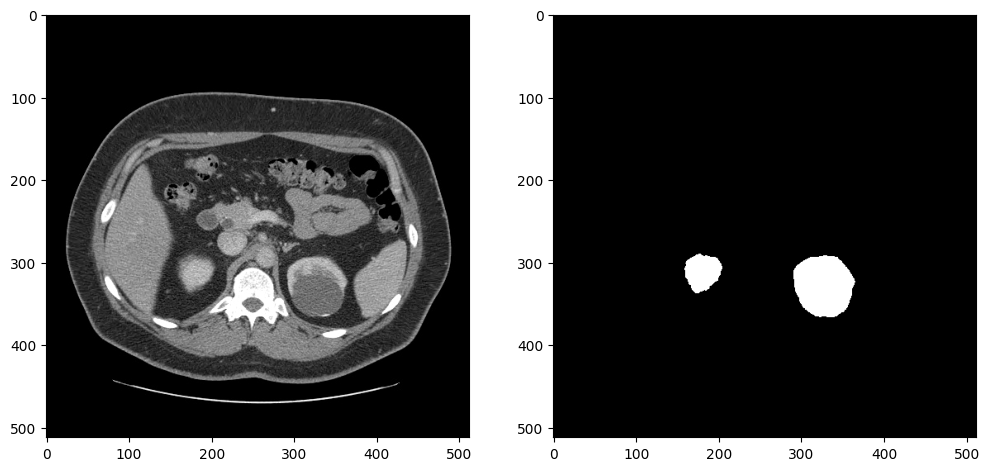
データローダーが予期した出力を返すかテストするため、イメージとマスクを表示します。画像とマスクは、サイズ変更と前処理の後、データローダーによって返されます。このデータセットには腎臓のないスライスが多数含まれているため、少なくとも 5000 の腎臓ピクセルを含むスライスを選択して、アノテーションが正しく見えることを確認します:
dataset = KitsDataset(BASEDIR)
# 腎臓の注釈を含むスライスを検出
# item[0] はアノテーション: (id, annotation_data)
image_data, mask = next(item for item in dataset if np.count_nonzero(item[1]) > 5000)
# 余分な画像次元を削除し、視覚化のために画像を回転および反転
image = rotate_and_flip(image_data.squeeze())

# データローダーは、注釈を (インデックス、マスク) として返し、マスクを形状 (H、W) で返す
mask = rotate_and_flip(mask)

fig, ax = plt.subplots(1, 2, figsize=(12, 6))
ax[0].imshow(image, cmap="gray")
ax[1].imshow(mask, cmap="gray");
Created dataset with 69 items. Base directory for data: kits19_frames_1
メトリック#
モデルのパフォーマンスを判断するメトリックを定義します。
このデモでは、TorchMetrics ライブラリーの F1 スコア、またはサイコロ係数を使用します。
def compute_f1(model: Union[torch.nn.Module, ov.CompiledModel], dataset: KitsDataset):
    """
    Compute binary F1 score of `model` on `dataset`
    F1 score metric is provided by the torchmetrics library
    `model` is expected to be a binary segmentation model, images in the
    dataset are expected in (N,C,H,W) format where N==C==1
    """
    metric = F1(ignore_index=0, task="binary", average="macro")
    with torch.no_grad():
        for image, target in dataset:
            input_image = torch.as_tensor(image).unsqueeze(0)
            if isinstance(model, ov.CompiledModel):
                output_layer = model.output(0)
                output = model(input_image)[output_layer]
                output = torch.from_numpy(output)
            else:
                output = model(input_image)
            label = torch.as_tensor(target.squeeze()).long()
            prediction = torch.sigmoid(output.squeeze()).round().long()
            metric.update(label.flatten(), prediction.flatten())
return metric.compute()量子化#
モデルを定量化する前に、比較のため FP32 モデルの F1 スコアを計算します:
fp32_f1 = compute_f1(model, dataset)
print(f"FP32 F1: {fp32_f1:.3f}")
FP32 F1: 0.999PyTorch モデルを OpenVINO IR に変換し、このノートブックの後半で FP32 モデルと INT8 モデルのパフォーマンスを比較するためシリアル化します。
fp32_ir_path = MODEL_DIR / Path("unet_kits19_fp32.xml")

fp32_ir_model = ov.convert_model(model, example_input=torch.ones(1, 1, 512, 512, dtype=torch.float32))
ov.save_model(fp32_ir_model, str(fp32_ir_path))WARNING:tensorflow:Please fix your imports.Module tensorflow.python.training.tracking.base has been moved to tensorflow.python.trackable.base.The old module will be deleted in version 2.11.[ WARNING ] Please fix your imports.Module %s has been moved to %s.The old module will be deleted in version %s. /opt/home/k8sworker/ci-ai/cibuilds/ov-notebook/OVNotebookOps-727/.workspace/scm/ov-notebook/.venv/lib/python3.8/site-packages/monai/networks/nets/basic_unet.py:168: TracerWarning: Converting a tensor to a Python boolean might cause the trace to be incorrect.We can't record the data flow of Python values, so this value will be treated as a constant in the future.This means that the trace might not generalize to other inputs!
if x_e.shape[-i - 1] != x_0.shape[-i - 1]:NNCF は、精度の低下を最小限に抑えながら、OpenVINO でニューラル・ネットワーク推論を最適化する一連の高度なアルゴリズムを提供します。
注: NNCF トレーニング後の量子化は、OpenVINO 2023.0 リリースで利用可能です。
事前トレーニングされた FP32 モデルとキャリブレーション・データセットから量子化モデルを作成します。最適化プロセスには次の手順が含まれます:
1. 量子化用のデータセットを作成します。
2. 最適化されたモデルを取得するには、`nncf.quantize` を実行します。
3. 量子化モデルを ONNX にエクスポートし、OpenVINO IR モデルに変換します。
4. ベンチマークのため、`ov.save_model` 関数を使用して INT8 モデルをシリアル化します。
def transform_fn(data_item):
"""
Extract the model's input from the data item.
The data item here is the data item that is returned from the data source per iteration.
This function should be passed when the data item cannot be used as model's input.
"""
images, _ = data_item
return images
data_loader = torch.utils.data.DataLoader(dataset)
calibration_dataset = nncf.Dataset(data_loader, transform_fn)
quantized_model = nncf.quantize(
model,
calibration_dataset,
# INT8 モデルをインテル® GPU で実行できるように、LeakyReLU 活性化を量子化しないでください
ignored_scope=nncf.IgnoredScope(patterns=[".*LeakyReLU.*"]),
)Output()Output()量子化されたモデルを OpenVINO IR モデルに変換して保存します。
dummy_input = torch.randn(1, 1, 512, 512)
int8_onnx_path = MODEL_DIR / "unet_kits19_int8.onnx"
int8_ir_path = Path(int8_onnx_path).with_suffix(".xml")
int8_ir_model = ov.convert_model(quantized_model, example_input=dummy_input, input=dummy_input.shape)
ov.save_model(int8_ir_model, str(int8_ir_path))
/opt/home/k8sworker/ci-ai/cibuilds/ov-notebook/OVNotebookOps-727/.workspace/scm/ov-notebook/.venv/lib/python3.8/site-packages/nncf/torch/quantization/layers.py:339: TracerWarning: Converting a tensor to a Python number might cause the trace to be incorrect.We can't record the data flow of Python values, so this value will be treated as a constant in the future.This means that the trace might not generalize to other inputs!
return self._level_low.item()
/opt/home/k8sworker/ci-ai/cibuilds/ov-notebook/OVNotebookOps-727/.workspace/scm/ov-notebook/.venv/lib/python3.8/site-packages/nncf/torch/quantization/layers.py:347: TracerWarning: Converting a tensor to a Python number might cause the trace to be incorrect.We can't record the data flow of Python values, so this value will be treated as a constant in the future.This means that the trace might not generalize to other inputs!
return self._level_high.item()
/opt/home/k8sworker/ci-ai/cibuilds/ov-notebook/OVNotebookOps-727/.workspace/scm/ov-notebook/.venv/lib/python3.8/site-packages/monai/networks/nets/basic_unet.py:168: TracerWarning: Converting a tensor to a Python boolean might cause the trace to be incorrect.We can't record the data flow of Python values, so this value will be treated as a constant in the future.This means that the trace might not generalize to other inputs!
if x_e.shape[-i - 1] != x_0.shape[-i - 1]: /opt/home/k8sworker/ci-ai/cibuilds/ov-notebook/OVNotebookOps-727/.workspace/scm/ov-notebook/.venv/lib/python3.8/site-packages/torch/jit/_trace.py:1116: TracerWarning: Output nr 1. of the traced function does not match the corresponding output of the Python function.Detailed error: Tensor-likes are not close!
Mismatched elements:
249132 / 262144 (95.0%)
Greatest absolute difference: 4.048818826675415 at index (0, 0, 237, 507) (up to 1e-05 allowed) Greatest relative difference: 53465.01457340121 at index (0, 0, 334, 396) (up to 1e-05 allowed)
_check_trace(このノートブックは、NNCF を使用したトレーニング後の量子化を示します。
NNCF は、量子化対応トレーニングや量子化以外のアルゴリズムもサポートしています。詳細については、NNCF リポジトリーの NNCF ドキュメントを参照してください。
FP32 モデルと INT8 モデルの比較#
ファイルサイズの比較#
fp32_ir_model_size = fp32_ir_path.with_suffix(".bin").stat().st_size / 1024
quantized_model_size = int8_ir_path.with_suffix(".bin").stat().st_size / 1024

print(f"FP32 IR model size: {fp32_ir_model_size:.2f} KB")
print(f"INT8 model size: {quantized_model_size:.2f} KB")
FP32 IR model size: 3864.14 KB
INT8 model size: 1953.48 KB推論デバイスの選択#
core = ov.Core()
# デフォルトでは、GPU が利用可能な場合は MULTI:CPU、GPU でベンチマークを行い、そうでない場合は CPU でベンチマークを行います
device_list = ["MULTI:CPU,GPU" if "GPU" in core.available_devices else "AUTO"]

import ipywidgets as widgets

device = widgets.Dropdown(
    options=core.available_devices + device_list,
    value=device_list[0],
    description="Device:",
    disabled=False,
)

deviceDropdown(description='Device:', index=1, options=('CPU', 'AUTO'), value='AUTO')元のモデルと量子化されたモデルのメトリックを比較して劣化がないことを確認#
int8_compiled_model = core.compile_model(int8_ir_model, device.value)
int8_f1 = compute_f1(int8_compiled_model, dataset)

print(f"FP32 F1: {fp32_f1:.3f}")
print(f"INT8 F1: {int8_f1:.3f}")
FP32 F1: 0.999
INT8 F1: 0.999FP32 IR モデルと量子化モデルのパフォーマンスの比較#
FP32 モデルと INT8 モデルの推論パフォーマンスを測定するには、ベンチマーク・ツールを使用します。
- OpenVINO の推論性能測定ツール。ベンチマーク・ツールは、OpenVINO 開発ツールの一部であるコマンドライン・アプリケーションであり、! benchmark_app または %sx benchmark_app を使用してノートブックで実行できます。
注: 最も正確なパフォーマンス推定を行うには、他のアプリケーションを閉じた後、ターミナル/コマンドプロンプトで
benchmark_appを実行することを推奨します。benchmark_app -m model.xml -d CPUを実行して、CPU で非同期推論のベンチマークを 1 分間実行します。GPU でベンチマークを行うには、CPUをGPUに変更します。benchmark_app --helpを実行すると、すべてのコマンドライン・オプションが表示されます。
# ! benchmark_app --help# Benchmark FP32 モデル
! benchmark_app -m $fp32_ir_path -d $device.value -t 15 -api sync[Step 1/11] Parsing and validating input arguments
[ INFO ] Parsing input parameters
[Step 2/11] Loading OpenVINO Runtime
[ INFO ] OpenVINO:
[ INFO ] Build .................................2024.2.0-15519-5c0f38f83f6-releases/2024/2
[ INFO ]
[ INFO ] Device info:
[ INFO ] AUTO
[ INFO ] Build .................................2024.2.0-15519-5c0f38f83f6-releases/2024/2
[ INFO ]
[ INFO ]
[Step 3/11] Setting device configuration
[ WARNING ] Performance hint was not explicitly specified in command line.Device (AUTO) performance hint will be set to PerformanceMode.THROUGHPUT.
[Step 4/11] Reading model files
[ INFO ] Loading model files
[ INFO ] Read model took 9.03 ms
[ INFO ] Original model I/O parameters:
[ INFO ] Model inputs:
[ INFO ] x (node: x) : f32 / [...]/ [?,?,?,?]
[ INFO ] Model outputs:
[ INFO ] *NO_NAME* (node: __module.final_conv/aten::_convolution/Add) : f32 / [...] / [?,1,16..,16..]
[Step 5/11] Resizing model to match image sizes and given batch
[ INFO ] Model batch size: 1
[Step 6/11] Configuring input of the model
[ INFO ] Model inputs:
[ INFO ] x (node: x) : f32 / [...]/ [?,?,?,?]
[ INFO ] Model outputs:
[ INFO ] *NO_NAME* (node: __module.final_conv/aten::_convolution/Add) : f32 / [...]/ [?,1,16..,16..]
[Step 7/11] Loading the model to the device
[ INFO ] Compile model took 178.45 ms
[Step 8/11] Querying optimal runtime parameters
[ INFO ] Model:
[ INFO ] NETWORK_NAME: Model0
[ INFO ] EXECUTION_DEVICES: ['CPU']
[ INFO ] PERFORMANCE_HINT: PerformanceMode.LATENCY
[ INFO ] OPTIMAL_NUMBER_OF_INFER_REQUESTS: 1
[ INFO ] MULTI_DEVICE_PRIORITIES: CPU
[ INFO ] CPU:
[ INFO ] AFFINITY: Affinity.CORE
[ INFO ] CPU_DENORMALS_OPTIMIZATION: False
[ INFO ] CPU_SPARSE_WEIGHTS_DECOMPRESSION_RATE: 1.0
[ INFO ] DYNAMIC_QUANTIZATION_GROUP_SIZE: 0
[ INFO ] ENABLE_CPU_PINNING: True
[ INFO ] ENABLE_HYPER_THREADING: False
[ INFO ] EXECUTION_DEVICES: ['CPU']
[ INFO ] EXECUTION_MODE_HINT: ExecutionMode.PERFORMANCE
[ INFO ] INFERENCE_NUM_THREADS: 12
[ INFO ] INFERENCE_PRECISION_HINT: <Type: 'float32'>
[ INFO ] KV_CACHE_PRECISION: <Type: 'float16'>
[ INFO ] LOG_LEVEL: Level.NO
[ INFO ] MODEL_DISTRIBUTION_POLICY: set()
[ INFO ] NETWORK_NAME: Model0
[ INFO ] NUM_STREAMS: 1
[ INFO ] OPTIMAL_NUMBER_OF_INFER_REQUESTS: 1
[ INFO ] PERFORMANCE_HINT: LATENCY
[ INFO ] PERFORMANCE_HINT_NUM_REQUESTS: 0
[ INFO ] PERF_COUNT: NO
[ INFO ] SCHEDULING_CORE_TYPE: SchedulingCoreType.ANY_CORE
[ INFO ] MODEL_PRIORITY: Priority.MEDIUM
[ INFO ] LOADED_FROM_CACHE: False
[ INFO ] PERF_COUNT: False
[Step 9/11] Creating infer requests and preparing input tensors
[ ERROR ] Input x is dynamic.Provide data shapes!
Traceback (most recent call last):
File "/opt/home/k8sworker/ci-ai/cibuilds/ov-notebook/OVNotebookOps-727/.workspace/scm/ov-notebook/.venv/lib/python3.8/site-packages/openvino/tools/benchmark/main.py", line 486, in main
data_queue = get_input_data(paths_to_input, app_inputs_info)
File "/opt/home/k8sworker/ci-ai/cibuilds/ov-notebook/OVNotebookOps-727/.workspace/scm/ov-notebook/.venv/lib/python3.8/site-packages/openvino/tools/benchmark/utils/inputs_filling.py", line 123, in get_input_data
raise Exception(f"Input {info.name} is dynamic. Provide data shapes!")
Exception: Input x is dynamic. Provide data shapes!
# Benchmark INT8 モデル
! benchmark_app -m $int8_ir_path -d $device.value -t 15 -api sync
[Step 1/11] Parsing and validating input arguments [ INFO ] Parsing input parameters [Step 2/11] Loading OpenVINO Runtime [ INFO ] OpenVINO: [ INFO ] Build .................................2024.2.0-15519-5c0f38f83f6-releases/2024/2 [ INFO ] [ INFO ] Device info: [ INFO ] AUTO [ INFO ] Build .................................2024.2.0-15519-5c0f38f83f6-releases/2024/2 [ INFO ] [ INFO ] [Step 3/11] Setting device configuration [ WARNING ] Performance hint was not explicitly specified in command line.Device (AUTO) performance hint will be set to PerformanceMode.THROUGHPUT. [Step 4/11] Reading model files [ INFO ] Loading model files [ INFO ] Read model took 10.91 ms [ INFO ] Original model I/O parameters: [ INFO ] Model inputs: [ INFO ] x (node: x) : f32 / [...]/ [1.1,512,512] [ INFO ] Model outputs: [ INFO ] *NO_NAME* (node: __module.final_conv/aten::_convolution/Add) : f32 / [...]/ [1,1,512,512] [Step 5/11] Resizing model to match image sizes and given batch [ INFO ] Model batch size: 1 [Step 6/11] Configuring input of the model [ INFO ] Model inputs: [ INFO ] x (node: x) : f32 / [N,C,H,W] / [1,1,512,512] [ INFO ] Model outputs: [ INFO ] *NO_NAME* (node: __module.final_conv/aten::_convolution/Add) : f32 / [...]/ [1,1,512,512] [Step 7/11] Loading the model to the device [ INFO ] Compile model took 229.32 ms [Step 8/11] Querying optimal runtime parameters [ INFO ] Model: [ INFO ] NETWORK_NAME: Model49 [ INFO ] EXECUTION_DEVICES: ['CPU'] [ INFO ] PERFORMANCE_HINT: PerformanceMode.LATENCY [ INFO ] OPTIMAL_NUMBER_OF_INFER_REQUESTS: 1 [ INFO ] MULTI_DEVICE_PRIORITIES: CPU [ INFO ] CPU: [ INFO ] AFFINITY: Affinity.CORE [ INFO ] CPU_DENORMALS_OPTIMIZATION: False [ INFO ] CPU_SPARSE_WEIGHTS_DECOMPRESSION_RATE: 1.0 [ INFO ] DYNAMIC_QUANTIZATION_GROUP_SIZE: 0 [ INFO ] ENABLE_CPU_PINNING: True [ INFO ] ENABLE_HYPER_THREADING: False [ INFO ] EXECUTION_DEVICES: ['CPU'] [ INFO ] EXECUTION_MODE_HINT: ExecutionMode.PERFORMANCE [ INFO ] INFERENCE_NUM_THREADS: 12 [ INFO ] INFERENCE_PRECISION_HINT: <Type: 'float32'> [ INFO ] KV_CACHE_PRECISION: <Type: 'float16'> [ INFO ] LOG_LEVEL: Level.NO [ INFO ] MODEL_DISTRIBUTION_POLICY: set() [ INFO ] NETWORK_NAME: Model49 [ INFO ] NUM_STREAMS: 1 [ INFO ] OPTIMAL_NUMBER_OF_INFER_REQUESTS: 1 [ INFO ] PERFORMANCE_HINT: LATENCY [ INFO ] PERFORMANCE_HINT_NUM_REQUESTS: 0 [ INFO ] PERF_COUNT: NO [ INFO ] SCHEDULING_CORE_TYPE: SchedulingCoreType.ANY_CORE [ INFO ] MODEL_PRIORITY: Priority.MEDIUM [ INFO ] LOADED_FROM_CACHE: False [ INFO ] PERF_COUNT: False [Step 9/11] Creating infer requests and preparing input tensors [ WARNING ] No input files were given for input 'x'!.This input will be filled with random values! [ INFO ] Fill input 'x' with random values [Step 10/11] Measuring performance (Start inference synchronously, limits: 15000 ms duration) [ INFO ] Benchmarking in inference only mode (inputs filling are not included in measurement loop). [ INFO ] First inference took 30.15 ms [Step 11/11] Dumping statistics report [ INFO ] Execution Devices:['CPU'] [ INFO ] Count: 964 iterations [ INFO ] Duration: 15012.54 ms [ INFO ] Latency: [ INFO ] Median: 15.32 ms [ INFO ] Average: 15.38 ms [ INFO ] Min: 14.99 ms [ INFO ] Max: 17.28 ms [ INFO ] Throughput: 64.21 FPS
推論結果を視覚的に比較#
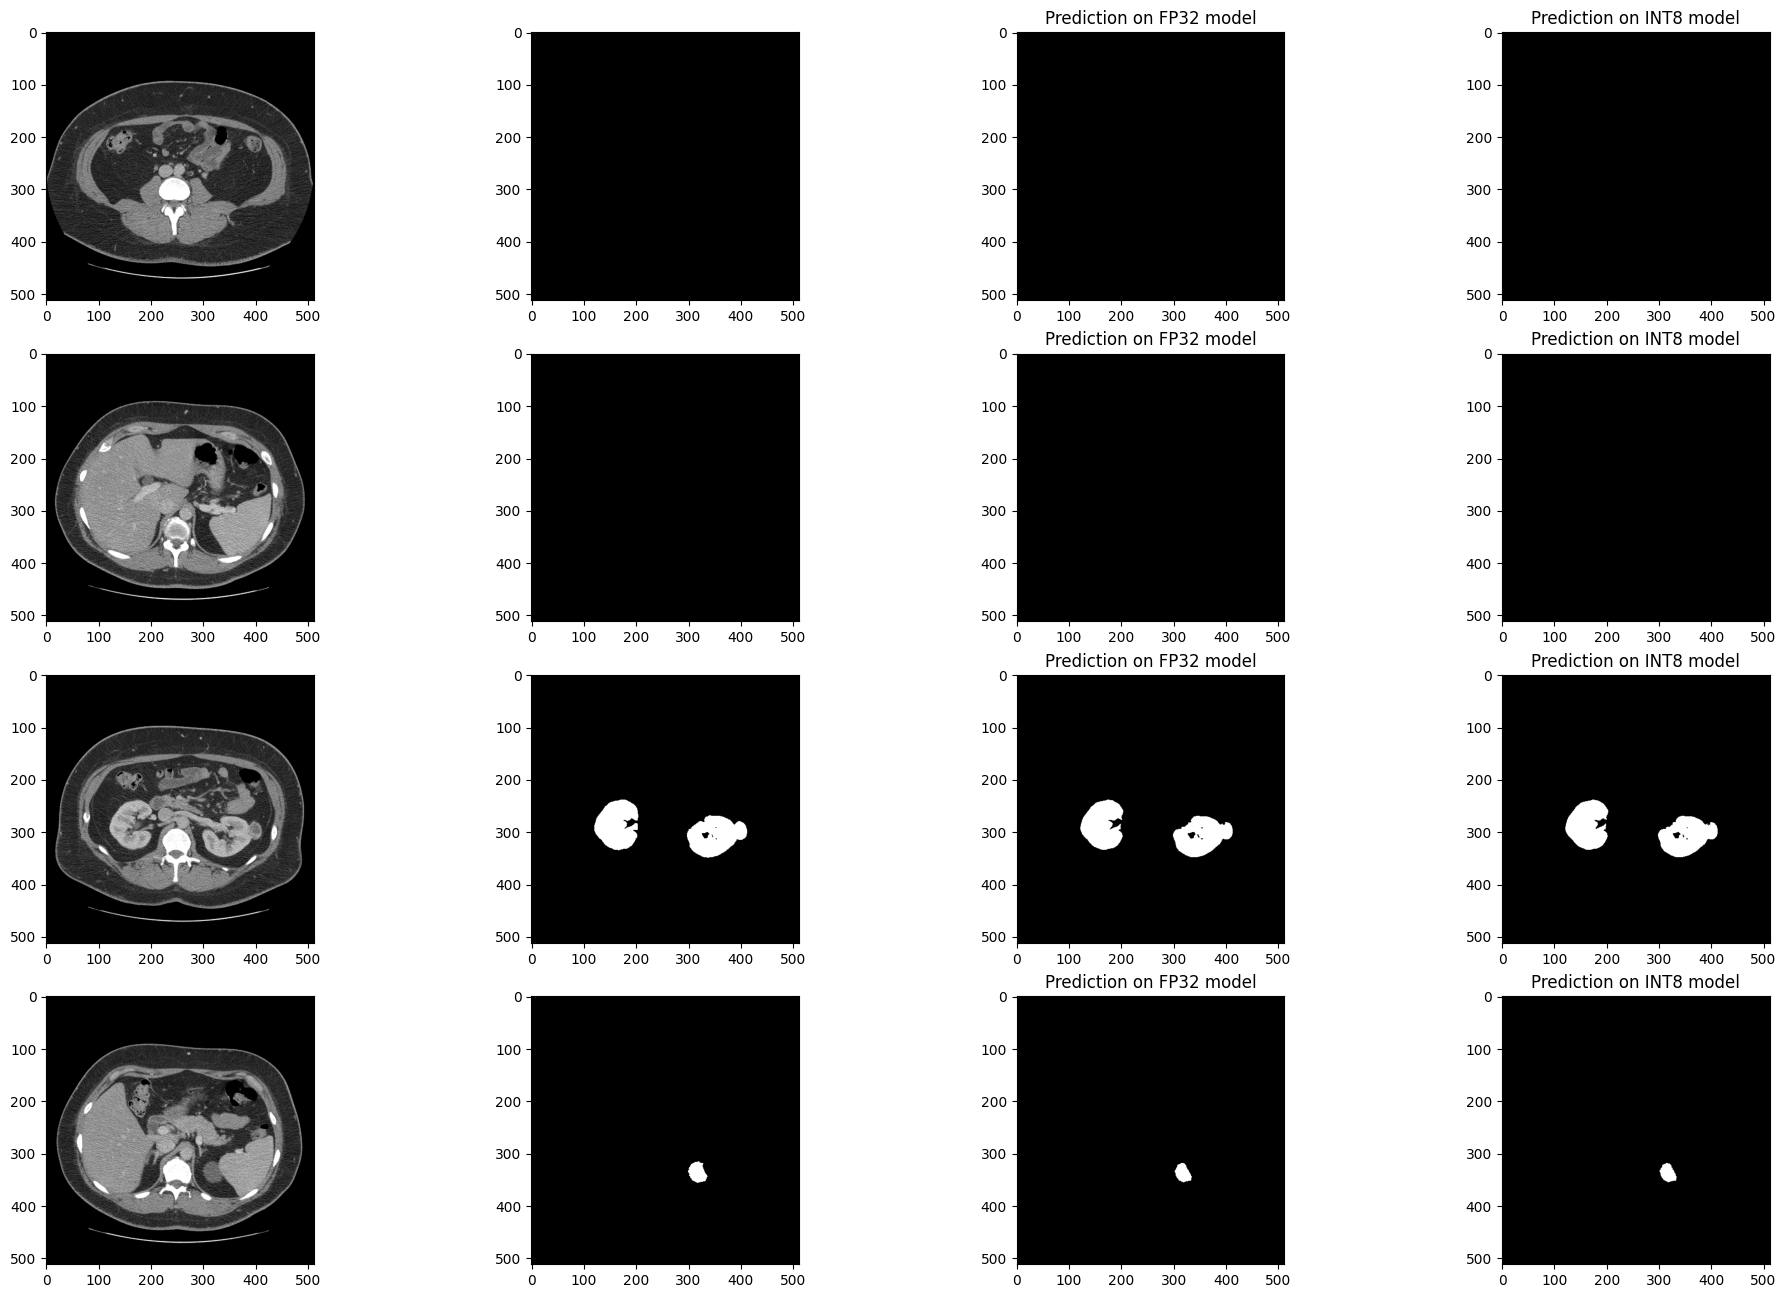
検証セットの 4 つのスライスでモデルの結果を視覚化します。FP32 IR モデルの結果を、量子化された INT8 モデルおよびリファレンス・セグメント化アノテーションの結果と比較します。
医療画像データセットは不均衡になる傾向があります。CT スキャンのスライスのほとんどには腎臓データが含まれていません。セグメント化モデルは、腎臓が存在する場所で腎臓を見つけるのに優れている (医学用語: 感度が良い) 必要がありますが、存在しない偽の腎臓は見つけない (特異度が良い) 必要があります。次のセルには 4 つのスライスがあります。2 つのスライスには腎臓のデータがなく、2 つのスライスには腎臓のデータが含まれています。この例では、スライス内の少なくとも 50 ピクセルに腎臓としてアノテーションが付けられている場合、スライスに腎臓データがあります。
このセルを再度実行すると、別のサブセットの結果が表示されます。ランダムシードは、このセルの特定の実行を再現できるように表示されます。
注: 画像はオプションで拡大およびサイズ変更を行った後に表示されます。Kits19 データセットでは、1 つを除くすべてのケースの入力形状が
(512, 512)です。
# シグモイド関数は、ネットワークの結果をバイナリーセグメント化マスクに
# 変換するために使用されます
def sigmoid(x):
    return np.exp(-np.logaddexp(0, -x))

num_images = 4
colormap = "gray"

# FP32 および INT8 モデルをロード
core = ov.Core()
fp_model = core.read_model(fp32_ir_path)
int8_model = core.read_model(int8_ir_path)
compiled_model_fp = core.compile_model(fp_model, device_name=device.value)
compiled_model_int8 = core.compile_model(int8_model, device_name=device.value)
output_layer_fp = compiled_model_fp.output(0)
output_layer_int8 = compiled_model_int8.output(0)

# データセットのサブセットを作成
background_slices = (item for item in dataset if np.count_nonzero(item[1]) == 0)
kidney_slices = (item for item in dataset if np.count_nonzero(item[1]) > 50)
data_subset = random.sample(list(background_slices), 2) + random.sample(list(kidney_slices), 2)

# シードを現在の時刻に設定。特定の結果を再現するには、印刷されたシードをコピーし、
# `seed` を手動でその値に設定します
seed = int(time.time())
random.seed(seed)
print(f"Visualizing results with seed {seed}")

fig, ax = plt.subplots(nrows=num_images, ncols=4, figsize=(24, num_images * 4))
for i, (image, mask) in enumerate(data_subset):
    display_image = rotate_and_flip(image.squeeze())
    target_mask = rotate_and_flip(mask).astype(np.uint8)
    # 画像にバッチ次元を追加し、FP および INT8 モデルで推論を行います
    input_image = np.expand_dims(image, 0)
    res_fp = compiled_model_fp([input_image])
    res_int8 = compiled_model_int8([input_image])

    # 推論出力を処理し、バイナリーセグメント化マスクに変換
    result_mask_fp = sigmoid(res_fp[output_layer_fp]).squeeze().round().astype(np.uint8)
    result_mask_int8 = sigmoid(res_int8[output_layer_int8]).squeeze().round().astype(np.uint8)
    result_mask_fp = rotate_and_flip(result_mask_fp)
    result_mask_int8 = rotate_and_flip(result_mask_int8)

    # 画像、アノテーション、FP32 結果、INT8 結果を表示
    ax[i, 0].imshow(display_image, cmap=colormap)
    ax[i, 1].imshow(target_mask, cmap=colormap)
    ax[i, 2].imshow(result_mask_fp, cmap=colormap)
    ax[i, 3].imshow(result_mask_int8, cmap=colormap)
    ax[i, 2].set_title("Prediction on FP32 model")
    ax[i, 3].set_title("Prediction on INT8 model")
Visualizing results with seed 1720820974
ライブ推論を表示#
ノートブック内のモデルに関するライブ推論を表示するには、OpenVINO の非同期処理機能を使用します。
Notebook Utils の show_live_inference 関数を使用してライブ推論を表示します。この関数は、Open Model Zoo の非同期パイプラインとモデル API を使用して、非同期推論を実行します。指定した CT スキャンの推論が完了すると、前処理と表示を含む合計時間とスループット (fps) が出力されます。
注: Firefox でちらつきが発生する場合は、Chrome または Edge を使用してこのノートブックを実行してください。
画像をロードしてサイズ変更#
Open Model Zoo モデル API に基づいて、SegmentationModel を使用してセグメント化モデルを OpenVINO ランタイムにロードします。このモデルの実装には、モデルの前処理と後処理が含まれます。SegmentationModel の場合、これには元の画像/フレームにセグメント化マスクのオーバーレイを作成するコードが含まれます。
CASE = 117

segmentation_model = SegmentationModel(ie=core, model_path=int8_ir_path, sigmoid=True, rotate_and_flip=True)
case_path = BASEDIR / f"case_{CASE:05d}"
image_paths = sorted(case_path.glob("imaging_frames/*jpg"))
print(f"{case_path.name}, {len(image_paths)} images")case_00117, 69 images推論を表示#
次のセルでは、show_live_inference 関数を実行します。この関数は、segmentation_model を指定されたデバイスにロードし (GPU デバイスでのモデルのロードを高速化するためのキャッシュを使用)、画像をロードして推論を実行し、実際の画像にロードされたフレームに結果をリアルタイムで表示します。
reader = LoadImage(image_only=True, dtype=np.uint8)
show_live_inference(
    ie=core,
    image_paths=image_paths,
    model=segmentation_model,
    device=device.value,
    reader=reader,
)
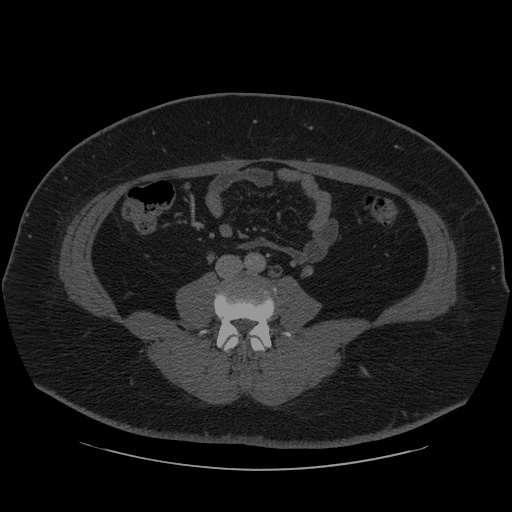
Loaded model to AUTO in 0.19 seconds. Total time for 68 frames: 2.39 seconds, fps:28.85関連情報#
OpenVINO: - NNCF リポジトリー - 高速モデル推論のためのニューラル・ネットワーク圧縮フレームワーク - OpenVINO API チュートリアル - OpenVINO PyPI (pip install openvino-dev)
Kits19 Data: - Kits19 チャレンジのホームページ - Kits19 GitHub リポジトリー - The KiTS19 チャレンジのデータ: 臨床的背景、CT セマンティック・セグメント化、手術結果を含む 300 件の腎腫瘍症例 - 造影 CT 画像における腎臓および腎臓腫瘍のセグメント化の最新技術: KiTS19 チャレンジの結果