FILM と OpenVINO を使用したフレーム補間#
この Jupyter ノートブックは、ローカルへのインストール後にのみ起動できます。

フレーム補間は、指定された一連の画像から中間画像を合成するプロセスです。この技術は、ビデオのリフレッシュ・レートを高めたり、スローモーション効果を作成するため時間的アップサンプリングによく使用されます。最近では、デジタルカメラやスマートフォンを使用して、高品質の写真を撮影するため数秒以内に何枚も写真を撮ることがあります。これらの “ほぼ複製” 写真間を補間すると、シーンの動きを明らかにする魅力的なビデオが作成され、多くの場合、元の写真よりもさらによい瞬間の感覚が得られます。
“FILM: ECCV 2022 で公開された “FILM: Frame Interpolation for Large Motion” では、類似した写真から高品質のスローモーション・ビデオを作成する方法が紹介されています。FILM は、小さな動きを適切に処理しながら、大きな動きで最先端の結果を達成する新しいニューラル・ネットワーク・アーキテクチャーです。
FILM モデルは 2 つのイメージを入力として受け取り、中央のイメージを出力します。推論時にモデルが再帰的に呼び出され、画像間の画像が出力されます。FILM には 3 つのコンポーネントがあります: 1. 各入力画像を深いマルチスケール (ピラミッド) 特徴で要約する特徴抽出機能。2. 各ピラミッドレベルでピクセル単位の動き (つまり、フロー) を計算する双方向動き推定器。3. 最終的な補間画像を出力する Fusion モジュール。
FILM は通常のビデオフレーム 3 つでトレーニングされ、中央のフレームが監視のためのグラウンドトゥルースとして機能します。
このチュートリアルでは、TensorFlow Hub をモデルソースとして使用します。
注: このチュートリアルを実行するには、システムに VP9 ビデオ・エンコーダーが必要です。Ubuntu* にはプリインストールされていますが、Windows* では手動でインストールする必要があります。
目次:
必要条件#
import platform
import os

%pip install -q "tensorflow-macos>=2.5; sys_platform == 'darwin' and platform_machine == 'arm64' and python_version > '3.8'" # macOS M1 and M2
%pip install -q "tensorflow-macos>=2.5,<=2.12.0; sys_platform == 'darwin' and platform_machine == 'arm64' and python_version <= '3.8'" # macOS M1 and M2
%pip install -q "tensorflow>=2.5; sys_platform == 'darwin' and platform_machine != 'arm64' and python_version > '3.8'" # macOS x86
%pip install -q "tensorflow>=2.5,<=2.12.0; sys_platform == 'darwin' and platform_machine != 'arm64' and python_version <= '3.8'" # macOS x86
%pip install -q "tensorflow>=2.5; sys_platform != 'darwin' and python_version > '3.8'"
%pip install -q "tensorflow>=2.5,<=2.12.0; sys_platform != 'darwin' and python_version <= '3.8'"

%pip install -q tensorflow_hub tf_keras numpy "opencv-python" tqdm "gradio>=4.19" Pillow "openvino>=2023.2.0"

if platform.system() != "Windows":
     %pip install -q "matplotlib>=3.4"
else:
     %pip install -q "matplotlib>=3.4,<3.7"
Note: you may need to restart the kernel to use updated packages.
Note: you may need to restart the kernel to use updated packages.
Note: you may need to restart the kernel to use updated packages.
Note: you may need to restart the kernel to use updated packages.
Note: you may need to restart the kernel to use updated packages.
Note: you may need to restart the kernel to use updated packages.
Note: you may need to restart the kernel to use updated packages.
Note: you may need to restart the kernel to use updated packages.from pathlib import Path
import requests
from typing import Optional, Generator
from datetime import datetime
import gc
os.environ["TF_CPP_MIN_LOG_LEVEL"] = "2"
os.environ["TF_USE_LEGACY_KERAS"] = "1"
os.environ["TFHUB_CACHE_DIR"] = str(Path("./tfhub_modules").resolve())
import tensorflow_hub as hub
import tensorflow as tf
import openvino as ov
import numpy as np
import cv2
import matplotlib.pyplot as plt
from tqdm.auto import tqdm
import gradio as gr
import PIL
import IPythonMODEL_PATH = Path("models/model.xml")
DATA_PATH = Path("data")
IMAGES = {
"https://github.com/openvinotoolkit/openvino_notebooks/assets/29454499/c3ddf65f-95ec-44ca-9ed4-3ef2d8f4b47e": Path("data/one.jpg"),
"https://github.com/openvinotoolkit/openvino_notebooks/assets/29454499/6d21f1ce-69eb-41b5-aedd-6e3c29013b30": Path("data/two.jpg"),
}
OUTPUT_VIDEO_PATH = DATA_PATH / "output.webm"
OV_OUTPUT_VIDEO_PATH = DATA_PATH / "ov_output.webm"
TIMES_TO_INTERPOLATE = 5
DATA_PATH.mkdir(parents=True, exist_ok=True)
PIL.ImageFile.LOAD_TRUNCATED_IMAGES = True
# Gradio は大きなメタデータを持つ PNG 画像を読み取ることができます画像を準備#
画像をダウンロードして NumPy 配列にキャストし、モデル入力として提供します。
def preprocess_np_frame(frame):
    result = frame.astype(np.float32) / 255 # [0, 1] に正規化
    result = result[np.newaxis, ...] # バッチ次元を追加
    return result

def prepare_input(img_url: str):
    if not IMAGES[img_url].exists():
        r = requests.get(img_url)
        with IMAGES[img_url].open("wb") as f:
            f.write(r.content)
    filename = str(IMAGES[img_url])
    img = cv2.imread(filename)
    img = cv2.cvtColor(img, cv2.COLOR_BGR2RGB)
    img = np.array(img)
    img = preprocess_np_frame(img)

    return img

input_images = [prepare_input(url) for url in IMAGES]

input = {
    "x0": input_images[0],
    "x1": input_images[1],
    "time": np.array([[0.5]], dtype=np.float32),
}plt.figure(figsize=(16, 8), layout="tight")
plt.subplot(1, 2, 1)
plt.imshow(input_images[0][0])
plt.axis("off")
plt.subplot(1, 2, 2)
plt.imshow(input_images[1][0])
plt.axis("off");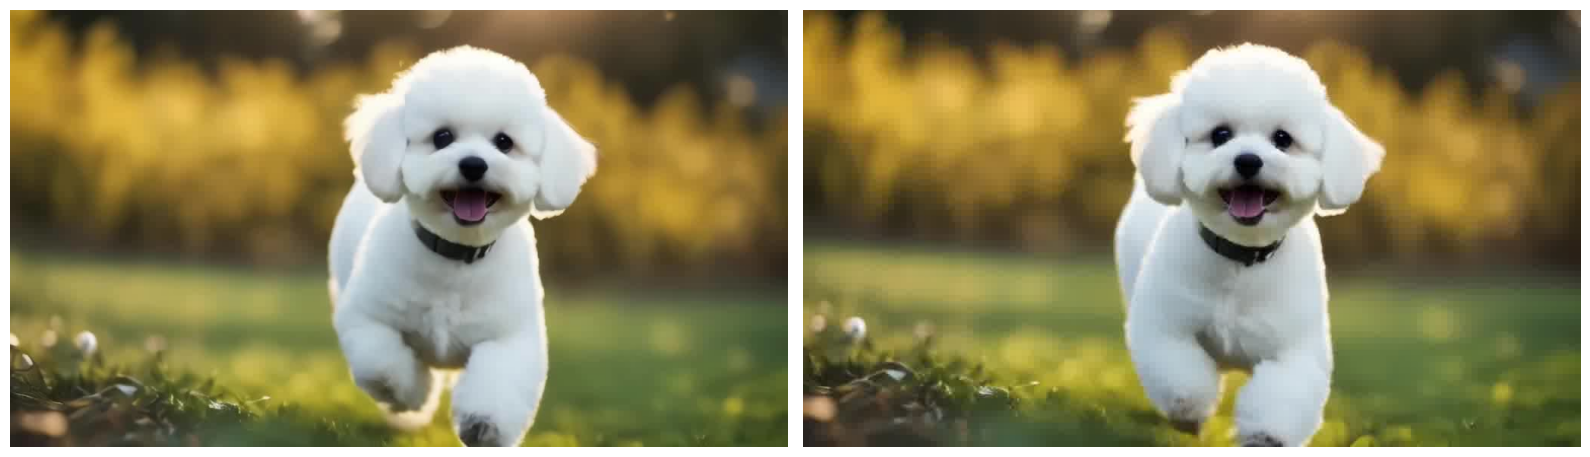
モデルのロード#
モデルは tensorflow_hub.KerasLayer 関数を使用してロードされます。次に、入力テンソルの形状を指定して、ロードされたオブジェクトを tf.keras.Model クラスにキャストします。
入力テンソルは次のとおりです: - time - 生成された画像がどこにあるべきかを示す \([0,1]\) の間の値。\(0.5\) は入力画像の中間にあります。- x0 - 初期フレーム。- x1 - 最終フレーム。
詳細については、TensorFlow Hub のモデルページを参照してください。
inputs = dict(
    x0=tf.keras.layers.Input(shape=(None, None, 3)),
    x1=tf.keras.layers.Input(shape=(None, None, 3)),
    time=tf.keras.layers.Input(shape=(1)),
)
model_url =
"https://www.kaggle.com/models/google/film/frameworks/tensorFlow2/variations/film/versions/1"
film_layer = hub.KerasLayer(model_url)(inputs)
film_model = tf.keras.Model(inputs=inputs, outputs=film_layer)モデルを推測#
単一中間フレーム補間#
output = film_model(input)
interpolated_image = output["image"][0]
interpolated_image = np.clip(interpolated_image, 0, 1)
def draw(img1, mid_img, img2):
title2img = {"First frame": img1, "Interpolated frame": mid_img, "Last frame": img2}
plt.figure(figsize=(16, 8), layout="tight")
for i, (title, img) in enumerate(title2img.items()):
ax = plt.subplot(1, 3, i + 1)
ax.set_title(title)
plt.imshow(img)
plt.axis("off")draw(input_images[0][0], interpolated_image, input_images[1][0])
再帰的なフレーム生成#
このプロセスでは、2 つの元のフレーム (最初と最後) を入力として受け取り、中間フレームを生成します。次に、 “最初 - 中間点”、“中間点 - 最後” のペアに対してこの処理が繰り返され、それらに中間点が提供されます。再帰は \(t=\) times_to_interpolate 回実行され、 \(2^t-1\) 画像が生成されます。
class Interpolator:
    def __init__(self, model):
        self._model = model

    def _recursive_generator(
        self,
        frame1: np.ndarray,
        frame2: np.ndarray,
        num_recursions: int,
        bar: Optional[tqdm] = None,
    ) -> Generator[np.ndarray, None, None]:
        """Splits halfway to repeatedly generate more frames.
            Args:
              frame1: Input image 1.
              frame2: Input image 2.
              num_recursions: How many times to interpolate the consecutive image pairs.

            Yields:
              The interpolated frames, including the first frame (frame1), but excluding
              the final frame2.
        """
        if num_recursions == 0:
            yield frame1
        else:
            time = np.array([[0.5]], dtype=np.float32)
            mid_frame = self._model({"x0": frame1, "x1": frame2, "time": time})["image"]
            if bar is not None:
                bar.update(1)
            yield from self._recursive_generator(frame1, mid_frame, num_recursions - 1, bar)
            yield from self._recursive_generator(mid_frame, frame2, num_recursions - 1, bar)

    def interpolate_recursively(self, frame1: np.ndarray, frame2: np.ndarray, times_to_interpolate: int) -> Generator[np.ndarray, None, None]:
        """Generates interpolated frames by repeatedly interpolating the midpoint.

        Args:
          frame1: Input image 1.
          frame2: Input image 2.
          times_to_interpolate: Number of times to do recursive midpoint
            interpolation.

        Yields: The interpolated frames (including the inputs).
        """
        num_frames = 2 ** (times_to_interpolate) - 1
        bar = tqdm(total=num_frames)
        yield from self._recursive_generator(frame1, frame2, times_to_interpolate, bar)
        # 最終フレームを別途生成
        yield frame2
def save_as_video(frames: Generator[np.ndarray, None, None], width: int, height: int, filename: Path):
out = cv2.VideoWriter(str(filename), cv2.VideoWriter_fourcc(*"VP90"), 30, (width, height))
for frame in frames:
img = frame[0]
img = np.clip(img, 0, 1)
rgb_img = img * 255
rgb_img = rgb_img.astype(np.uint8)
bgr_img = cv2.cvtColor(rgb_img, cv2.COLOR_RGB2BGR)
out.write(bgr_img)
out.release()height, width = input_images[0][0].shape[:2]
interpolator = Interpolator(film_model)
frames = interpolator.interpolate_recursively(input_images[0], input_images[1], 5)
save_as_video(frames, width, height, OUTPUT_VIDEO_PATH)OpenCV: FFMPEG: tag 0x30395056/'VP90' is not supported with codec id 167 and format 'webm / WebM'0%| | 0/31 [00:00<?, ?it/s]IPython.display.Video(filename=OUTPUT_VIDEO_PATH, embed=True)モデルを OpenVINO IR に変換#
TensorFlow Keras モデルを OpenVINO 中間表現 (IR) に変換するには、openvino.convert_model() 関数を呼び出し、モデルを引数として渡します。その後、openvino.save_model() 関数を使用して、モデル・オブジェクトをディスクにシリアル化できます。
if not MODEL_PATH.exists():
    converted_model = ov.convert_model(film_model)
    ov.save_model(converted_model, MODEL_PATH)
    del converted_model
del film_model
gc.collect()1356推論#
推論デバイスの選択#
OpenVINO を使用して推論を実行するためにドロップダウン・リストからデバイスを選択します
import ipywidgets as widgets

core = ov.Core()
device = widgets.Dropdown(
    options=core.available_devices + ["AUTO"],
    value="AUTO",
    description="Device:",
    disabled=False,
)

deviceDropdown(description='Device:', index=3, options=('CPU', 'GPU.0', 'GPU.1', 'AUTO'), value='AUTO')compiled_model = core.compile_model(MODEL_PATH, device.value)単一中間フレーム補間#
モデル出力には補助推論データを含む複数のテンソルが含まれます。メインの出力テンソル (補間されたイメージ) は、 “image” キーに保存されます。
result = compiled_model(input)["image"]
image = result[0]
image = np.clip(image, 0, 1)
モデルは中間画像を返しました。確認します。
draw(input_images[0][0], image, input_images[1][0])
再帰的なフレーム生成#
次に、最初の画像、中間画像、最後の画像の間でフレームを再帰的に生成して、滑らかなビデオを作成します。
height, width = input_images[0][0].shape[:2]
ov_interpolator = Interpolator(compiled_model)
frames = ov_interpolator.interpolate_recursively(input_images[0], input_images[1], TIMES_TO_INTERPOLATE)
save_as_video(frames, width, height, OV_OUTPUT_VIDEO_PATH)OpenCV: FFMPEG: tag 0x30395056/'VP90' is not supported with codec id 167 and format 'webm / WebM'0%| | 0/31 [00:00<?, ?it/s]IPython.display.Video(filename=OV_OUTPUT_VIDEO_PATH, embed=True)インタラクティブな推論#
def generate(frame1, frame2, times_to_interpolate, _=gr.Progress(track_tqdm=True)):
    x0, x1 = [preprocess_np_frame(frame) for frame in [frame1, frame2]]
    frames = ov_interpolator.interpolate_recursively(x0, x1, times_to_interpolate)
    height, width = frame1.shape[:2]
    filename = DATA_PATH / f"output_{datetime.now().isoformat()}.webm"
    save_as_video(frames, width, height, filename)
    return filename

demo = gr.Interface(
    generate,
    [
        gr.Image(label="First image"),
        gr.Image(label="Last image"),
        gr.Slider(
            1,
            8,
            step=1,
            label="Times to interpolate",
            info="""Controls the number of times the frame interpolator is invoked.
        The output will be the interpolation video with (2^value + 1) frames, fps of 30.""",
        ),
    ],
    gr.Video(),
    examples=[[*IMAGES.values(), 5]],
    allow_flagging="never",
)
try:
    demo.queue().launch(debug=False)
except Exception:
    demo.queue().launch(share=True, debug=False)
# リモートで起動する場合は、server_name と server_port を指定
# demo.launch(server_name='your server name', server_port='server port in int')
# 詳細については、ドキュメントをご覧ください: https://gradio.app/docs/