MobileCLIP と OpenVINO を使用したビジュアルコンテンツ検索#
この Jupyter ノートブックはオンラインで起動でき、ブラウザーのウィンドウで対話型環境を開きます。ローカルにインストールすることもできます。次のオプションのいずれかを選択します:


セマンティック・ビジュアル・コンテンツ検索は、テキストクエリーまたは入力画像を使用して画像 (フォトギャラリー、ビデオ) のデータベースを検索し、検索クエリーと意味的に類似する画像を見つけるマシン・ラーニング・タスクです。歴史的に、画像用の堅牢な検索エンジンを構築するのは困難でした。ファイル名や画像のメタデータなどの機能で検索したり、画像周辺のコンテキスト (画像がテキストの一部に表示される場合は代替テキストや周囲のテキストなど) を使用して、より豊富な検索機能を提供できます。これは、特定のユーザークエリーに意味的に関連する画像を識別できるニューラル・ネットワークが登場する以前のことです。
対照言語画像事前トレーニング (CLIP) モデルは、数十行のコードでセマンティック検索エンジンを実装する手段を提供します。CLIP モデルは、何百万ものテキストと画像のペアでトレーニングされており、画像とテキストの組み合わせからセマンティクスをエンコードします。CLIP を使用すると、テキストクエリーを提供することができ、CLIP はクエリーに最も関連性の高い画像を返します。
このチュートリアルでは、MobileCLIP を使用して、ビデオ内の関連フレームを見つけるビジュアルコンテンツ検索エンジンを実装する方法について説明します。#### 内容:
必要条件#
from pathlib import Path

repo_dir = Path("./ml-mobileclip")

if not repo_dir.exists():
     !git clone https://github.com/apple/ml-mobileclip.git
Cloning into 'ml-mobileclip'...
remote: Enumerating objects: 68, done.[K
remote: Counting objects: 100% (68/68), done.[K
remote: Compressing objects: 100% (51/51), done.[K
remote: Total 68 (delta 19), reused 65 (delta 16), pack-reused 0[K
Unpacking objects: 100% (68/68), 447.59 KiB | 4.03 MiB/s, done.%pip install -q "./ml-mobileclip" --no-deps
%pip install -q "clip-benchmark>=1.4.0" "datasets>=2.8.0" "open-clip-torch>=2.20.0" "timm>=0.9.5" "torch>=1.13.1" "torchvision>=0.14.1" --extra-index-url https://download.pytorch.org/whl/cpu
%pip install -q "openvino>=2024.0.0" "gradio>=4.19" "matplotlib" "Pillow" "altair" "pandas" "opencv-python" "tqdm"Note: you may need to restart the kernel to use updated packages.
ERROR: pip's dependency resolver does not currently take into account all the packages that are installed.This behaviour is the source of the following dependency conflicts.
mobileclip 0.1.0 requires torch==1.13.1, but you have torch 2.3.1+cpu which is incompatible.
mobileclip 0.1.0 requires torchvision==0.14.1, but you have torchvision 0.18.1+cpu which is incompatible.
Note: you may need to restart the kernel to use updated packages.
Note: you may need to restart the kernel to use updated packages.モデルの選択#
作業を開始するには、デモンストレーションで使用するモデルを選択する必要があります。デフォルトでは MobileCLIP モデルを使用しますが、比較のため次のモデルから選択できます:
CLIP - CLIP (Contrastive Language-Image Pre-Training) は、さまざまな (画像、テキスト) ペアでトレーニングされたニューラル・ネットワークです。タスクを直接最適化することなく、与えられた画像に対して最も関連性の高いテキストを予測するように自然言語で指示できます。CLIP は、ViT のようなトランスフォーマーを使用して視覚的特徴を取得し、因果言語モデルによってテキスト特徴を取得します。次に、テキストと視覚的特徴は、同一の次元を持つ潜在空間に投影されます。投影された画像とテキストの特徴間のドット積は、類似度スコアとして使用されます。このモデルの詳細については、研究論文、OpenAI ブログ、モデルカード、GitHub リポジトリーをご覧ください。
SigLIP - SigLIP モデルは、言語画像の事前トレーニング向けのシグモイド損失で提案されました。SigLIP は、CLIP (Contrastive Language–Image Pre-training) で使用される損失関数を単純なペアワイズシグモイド損失に置き換えることを提案します。これにより、ImageNet でのゼロショット分類精度のパフォーマンスが向上します。このモデルの詳細については、研究論文および GitHub リポジトリーをご覧ください。
MobileCLIP - MobileCLIP は、マルチモーダル強化トレーニングという斬新で効率的なトレーニング・アプローチとともに、実行時のパフォーマンスに合わせて最適化された、効率的な画像テキストモデルの新しいファミリーです。最小のバリアントである MobileCLIP-S0 は、OpenAI の CLIP ViT-b16 モデルと同様のゼロショット・パフォーマンスを実現しながら、数倍高速で 2.8 倍小さくなります。モデルの詳細については、論文とGitHub リポジトリーを参照してください。
import ipywidgets as widgets

model_dir = Path("checkpoints")

supported_models = {
    "MobileCLIP": {
        "mobileclip_s0": {
            "model_name": "mobileclip_s0",
            "pretrained": model_dir / "mobileclip_s0.pt",
            "url": "https://docs-assets.developer.apple.com/ml-research/datasets/mobileclip/mobileclip_s0.pt",
            "image_size": 256,
        },
        "mobileclip_s1": {
            "model_name": "mobileclip_s1",
            "pretrained": model_dir / "mobileclip_s1.pt",
            "url": "https://docs-assets.developer.apple.com/ml-research/datasets/mobileclip/mobileclip_s1.pt",
            "image_size": 256,
        },
        "mobileclip_s2": {
            "model_name": "mobileclip_s0",
            "pretrained": model_dir / "mobileclip_s2.pt",
            "url": "https://docs-assets.developer.apple.com/ml-research/datasets/mobileclip/mobileclip_s2.pt",
            "image_size": 256,
        },
        "mobileclip_b": {
            "model_name": "mobileclip_b",
            "pretrained": model_dir / "mobileclip_b.pt",
            "url": "https://docs-assets.developer.apple.com/ml-research/datasets/mobileclip/mobileclip_b.pt",
            "image_size": 224,
        },
        "mobileclip_blt": {
            "model_name": "mobileclip_b",
            "pretrained": model_dir / "mobileclip_blt.pt",
            "url": "https://docs-assets.developer.apple.com/ml-research/datasets/mobileclip/mobileclip_blt.pt",
            "image_size": 224,
        },
    },
    "CLIP":
            { "clip-vit-b-32": {
            "model_name": "ViT-B-32",
            "pretrained": "laion2b_s34b_b79k",
            "image_size": 224,
        },
        "clip-vit-b-16": {
            "image_name": "ViT-B-16",
            "pretrained": "openai",
            "image_size": 224,
        },
        "clip-vit-l-14": {
            "image_name": "ViT-L-14",
            "pretrained": "datacomp_xl_s13b_b90k",
            "image_size": 224,
        },
        "clip-vit-h-14": {
            "image_name": "ViT-H-14",
            "pretrained": "laion2b_s32b_b79k",
            "image_size": 224,
        },
    },
    "SigLIP": {
        "siglip-vit-b-16": {
            "model_name": "ViT-B-16-SigLIP",
            "pretrained": "webli",
            "image_size": 224,
        },
        "siglip-vit-l-16": {
            "model_name": "ViT-L-16-SigLIP-256",
            "pretrained": "webli",
            "image_size": 256,
        },
    },
}

model_type = widgets.Dropdown(options=supported_models.keys(), default="MobileCLIP", description="Model type:")
model_typeDropdown(description='Model type:', options=('MobileCLIP', 'CLIP', 'SigLIP'), value='MobileCLIP')available_models = supported_models[model_type.value]
model_checkpoint = widgets.Dropdown(
options=available_models.keys(),
default=list(available_models),
description="Model:",
)
model_checkpointDropdown(description='Model:', options=('mobileclip_s0', 'mobileclip_s1', 'mobileclip_s2', 'mobileclip_b', 'mo…import requests
r = requests.get(
url="https://raw.githubusercontent.com/openvinotoolkit/openvino_notebooks/latest/utils/notebook_utils.py",
)
open("notebook_utils.py", "w").write(r.text)
from notebook_utils import download_file
model_config = available_models[model_checkpoint.value]モデルの推論を実行#
実際のモデルを見てみます。特定のオブジェクトが埋め込みを使用して表現されている画像を探します。埋め込みは、テキストや画像などのデータの数値表現です。モデルは、画像の内容に関するセマンティクスを埋め込み形式でエンコードすることを学習しました。この機能により、モデルは画像テキスト検索を含むさまざまなタスクを解決できるため強力になります。目標を達成するには、次のことが必要です:
データセット内のすべての画像の埋め込みを計算します。
ユーザークエリー (“black dog” や “car” など) のテキスト埋め込みを計算します。
テキスト埋め込みと画像埋め込みを比較して、関連する埋め込みを見つけます。
2 つの埋め込みが近いほど、それらが表す内容は類似しています。
画像ギャラリーの準備#
from typing import List
import matplotlib.pyplot as plt
import numpy as np
from PIL import Image

def visualize_result(images: List, query: str = "", selected: List[int] = None):
    """
    Utility function for visualization classification results
    params:
        images (List[Image]) - list of images for visualization
        query (str) - title for visualization
        selected (List[int]) - list of selected image indices from images
    returns:
        matplotlib.Figure
    """
    figsize = (20, 5)
    fig, axs = plt.subplots(1, 4, figsize=figsize, sharex="all", sharey="all")
    fig.patch.set_facecolor("white")
    list_axes = list(axs.flat)
    if query:
        fig.suptitle(query, fontsize=20)
    for idx, a in enumerate(list_axes):
        a.set_xticklabels([])
        a.set_yticklabels([])
        a.get_xaxis().set_visible(False)
        a.get_yaxis().set_visible(False)
        a.grid(False)
        a.imshow(images[idx])
        if selected is not None and idx not in selected:
            mask = np.ones_like(np.array(images[idx]))
            a.imshow(mask, "jet", interpolation="none", alpha=0.75)
    return fig

images_urls = [
    "https://github.com/openvinotoolkit/openvino_notebooks/assets/29454499/282ce53e-912d-41aa-ab48-2a001c022d74",
    "https://github.com/openvinotoolkit/openvino_notebooks/assets/29454499/9bb40168-82b5-4b11-ada6-d8df104c736c",
    "https://github.com/openvinotoolkit/openvino_notebooks/assets/29454499/0747b6db-12c3-4252-9a6a-057dcf8f3d4e",
    "https://storage.openvinotoolkit.org/repositories/openvino_notebooks/data/data/image/coco_bricks.png",
]
image_names = ["red_panda.png", "cat.png", "raccoon.png", "dog.png"]
sample_path = Path("data")
sample_path.mkdir(parents=True, exist_ok=True)

images = []
for image_name, image_url in zip(image_names, images_urls):
    image_path = sample_path / image_name
    if not image_path.exists():
        download_file(image_url, filename=image_name, directory=sample_path)
    images.append(Image.open(image_path).convert("RGB").resize((640, 420)))

input_labels = ["cat"]
text_descriptions = [f"This is a photo of a {label}" for label in input_labels]

visualize_result(images, "image gallery");
data/red_panda.png: 0%| | 0.00/50.6k [00:00<?, ?B/s]data/cat.png: 0%| | 0.00/54.5k [00:00<?, ?B/s]data/raccoon.png: 0%| | 0.00/106k [00:00<?, ?B/s]data/dog.png: 0%| | 0.00/716k [00:00<?, ?B/s]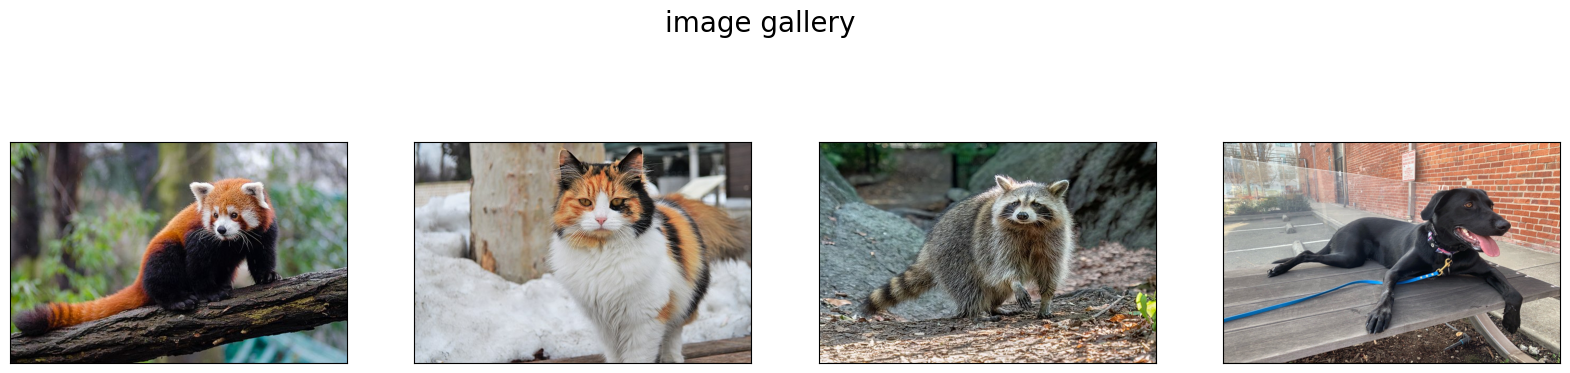
モデルの準備#
以下のコードは、モデルの重みをダウンロードし、モデルクラスのインスタンスと前処理ユーティリティーを作成します。
import torch
import time
from PIL import Image
import mobileclip
import open_clip

# モデルをインスタンス化
model_name = model_config["model_name"]
pretrained = model_config["pretrained"]
if model_type.value == "MobileCLIP":
    model_dir.mkdir(exist_ok=True)
    model_url = model_config["url"]
    download_file(model_url, directory=model_dir)
    model, _, preprocess = mobileclip.create_model_and_transforms(model_name, pretrained=pretrained)
    tokenizer = mobileclip.get_tokenizer(model_name)
else:
    model, _, preprocess = open_clip.create_model_and_transforms(model_name, pretrained=pretrained)
    tokenizer = open_clip.get_tokenizer(model_name)
checkpoints/mobileclip_s0.pt: 0%| | 0.00/206M [00:00<?, ?B/s]検索の実行#
image_tensor = torch.stack([preprocess(image) for image in images])
text = tokenizer(text_descriptions)

with torch.no_grad():
    # 画像の埋め込みを計算
    image_encoding_start = time.perf_counter()
    image_features = model.encode_image(image_tensor)
    image_encoding_end = time.perf_counter()
    print(f"Image encoding took {image_encoding_end - image_encoding_start:.3} ms")
    # テキスト埋め込みを計算
    text_encoding_start = time.perf_counter()
    text_features = model.encode_text(text)
    text_encoding_end = time.perf_counter()
    print(f"Text encoding took {text_encoding_end - text_encoding_start:.3} ms")

    # 埋め込みを正規化
    image_features /= image_features.norm(dim=-1, keepdim=True)
    text_features /= text_features.norm(dim=-1, keepdim=True)

    # 類似性スコアを計算
    image_probs = (100.0 * text_features @ image_features.T).softmax(dim=-1)
    selected_image = [torch.argmax(image_probs).item()]

visualize_result(images, input_labels[0], selected_image);
Image encoding took 0.123 ms
Text encoding took 0.0159 ms
モデルを OpenVINO 中間表現形式に変換#
OpenVINO で最良の結果を得るには、モデルを OpenVINO IR 形式に変換することを推奨します。OpenVINO はモデル・トランスフォーメーション API を介して PyTorch をサポートします。PyTorch モデルを OpenVINO IR 形式に変換するには、モデル・トランスフォーメーション API の ov.convert_model を使用します。ov.convert_model 関数は、デバイスにロードして予測を開始できる状態の OpenVINO モデル・オブジェクトを返します。
このモデルは、別々に使用できる画像エンコーダーとテキスト・エンコーダーの 2 つのパーツで構成されています。各パーツを OpenVINO に変換してみます。
import types
import torch.nn.functional as F

def se_block_forward(self, inputs):
    """Apply forward pass."""
    b, c, h, w = inputs.size()
    x = F.avg_pool2d(inputs, kernel_size=[8, 8])
    x = self.reduce(x)
    x = F.relu(x)
    x = self.expand(x)
    x = torch.sigmoid(x)
    x = x.view(-1, c, 1, 1)
    return inputs * x
import openvino as ov
import gc
ov_models_dir = Path("ov_models")
ov_models_dir.mkdir(exist_ok=True)
image_encoder_path = ov_models_dir / f"{model_checkpoint.value}_im_encoder.xml"
if not image_encoder_path.exists():
if "mobileclip_s" in model_name:
model.image_encoder.model.conv_exp.se.forward = types.MethodType(se_block_forward, model.image_encoder.model.conv_exp.se)
model.forward = model.encode_image
ov_image_encoder = ov.convert_model(
model,
example_input=image_tensor,
input=[-1, 3, image_tensor.shape[2], image_tensor.shape[3]],
)
ov.save_model(ov_image_encoder, image_encoder_path)
del ov_image_encoder
gc.collect()
text_encoder_path = ov_models_dir / f"{model_checkpoint.value}_text_encoder.xml"
if not text_encoder_path.exists():
model.forward = model.encode_text
ov_text_encoder = ov.convert_model(model, example_input=text, input=[-1, text.shape[1]])
ov.save_model(ov_text_encoder, text_encoder_path)
del ov_text_encoder
gc.collect()
del model
gc.collect();['image']/opt/home/k8sworker/ci-ai/cibuilds/ov-notebook/OVNotebookOps-727/.workspace/scm/ov-notebook/.venv/lib/python3.8/site-packages/mobileclip/modules/common/transformer.py:125: TracerWarning: Converting a tensor to a Python boolean might cause the trace to be incorrect.We can't record the data flow of Python values, so this value will be treated as a constant in the future.This means that the trace might not generalize to other inputs!
if seq_len != self.num_embeddings:['text']OpenVINO モデル推論を実行#
画像エンコーダー向けのデバイスを選択#
core = ov.Core()

import ipywidgets as widgets

device = widgets.Dropdown(
    options=core.available_devices + ["AUTO"],
    value="AUTO",
    description="Device:",
    disabled=False,
)

deviceDropdown(description='Device:', index=1, options=('CPU', 'AUTO'), value='AUTO')ov_compiled_image_encoder = core.compile_model(image_encoder_path, device.value)
ov_compiled_image_encoder(image_tensor);テキスト・エンコーダー向けのデバイスを選択#
deviceDropdown(description='Device:', index=1, options=('CPU', 'AUTO'), value='AUTO')ov_compiled_text_encoder = core.compile_model(text_encoder_path, device.value)
ov_compiled_text_encoder(text);検索の実行#
image_encoding_start = time.perf_counter()
image_features = torch.from_numpy(ov_compiled_image_encoder(image_tensor)[0])
image_encoding_end = time.perf_counter()
print(f"Image encoding took {image_encoding_end - image_encoding_start:.3} ms")
text_encoding_start = time.perf_counter()
text_features = torch.from_numpy(ov_compiled_text_encoder(text)[0])
text_encoding_end = time.perf_counter()
print(f"Text encoding took {text_encoding_end - text_encoding_start:.3} ms")
image_features /= image_features.norm(dim=-1, keepdim=True)
text_features /= text_features.norm(dim=-1, keepdim=True)

image_probs = (100.0 * text_features @ image_features.T).softmax(dim=-1)
selected_image = [torch.argmax(image_probs).item()]

visualize_result(images, input_labels[0], selected_image);
Image encoding took 0.0321 ms
Text encoding took 0.00763 ms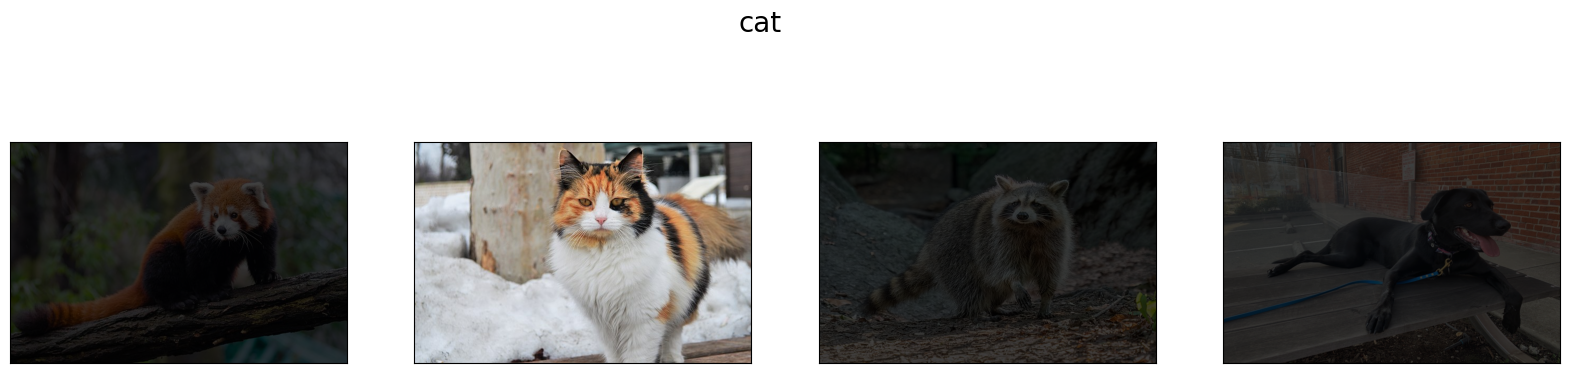
インタラクティブなデモ#
ここでは、テキストクエリーまたは画像でビデオ内のフレームを検索するチュートリアル・モデルでサポートされているさまざまな方法を試すことができます。ビデオをアップロードし、検索用のテキストクエリーまたは参照画像を提供すると、モデルは提供されたクエリーに従って最も関連性の高いフレームを見つけます。モデルによって検索に最適なしきい値が異なることに注意してください。
import altair as alt
import cv2
import gradio as gr
import pandas as pd
import torch
from PIL import Image
from torch.utils.data import DataLoader, Dataset
from torchvision.transforms.functional import to_pil_image, to_tensor
from torchvision.transforms import (
CenterCrop,
Compose,
InterpolationMode,
Resize,
ToTensor,
)
from open_clip.transform import image_transform
current_device = device.value
current_model = image_encoder_path.name.split("_im_encoder")[0]
available_converted_models = [model_file.name.split("_im_encoder")[0] for model_file in
ov_models_dir.glob("*_im_encoder.xml")]
available_devices = list(core.available_devices) + ["AUTO"]
download_file(
"https://github.com/intel-iot-devkit/sample-videos/raw/master/car-detection.mp4",
directory=sample_path,
)
download_file(
"https://storage.openvinotoolkit.org/repositories/openvino_notebooks/data/data/video/Coco%20Walking%20in%20Berkeley.mp4",
directory=sample_path,
filename="coco.mp4",
)
def get_preprocess_and_tokenizer(model_name):
if "mobileclip" in model_name:
resolution = supported_models["MobileCLIP"][model_name]["image_size"]
resize_size = resolution
centercrop_size = resolution
aug_list = [
Resize(
resize_size,
interpolation=InterpolationMode.BILINEAR,
),
CenterCrop(centercrop_size),
ToTensor(),
]
preprocess = Compose(aug_list)
tokenizer = mobileclip.get_tokenizer(supported_models["MobileCLIP"][model_name]["model_name"])
else:
model_configs = supported_models["SigLIP"] if "siglip" in model_name else supported_models["CLIP"]
resize_size = model_configs[model_name]["image_size"]
preprocess = image_transform((resize_size, resize_size), is_train=False, resize_mode="longest")
tokenizer = open_clip.get_tokenizer(model_configs[model_name]["model_name"])
return preprocess, tokenizer
def run(
path: str,
text_search: str,
image_search: Image.Image,
model_name: str,
device: str,
thresh: float,
stride: int,
batch_size: int,
):
assert path, "An input video should be provided"
assert text_search is not None or image_search is not None, "A text or image query should be provided"
global current_model
global current_device
global preprocess
global tokenizer
global ov_compiled_image_encoder
global ov_compiled_text_encoder
if current_model != model_name or device != current_device:
ov_compiled_image_encoder = core.compile_model(ov_models_dir / f"{model_name}_im_encoder.xml", device)
ov_compiled_text_encoder = core.compile_model(ov_models_dir / f"{model_name}_text_encoder.xml", device)
preprocess, tokenizer = get_preprocess_and_tokenizer(model_name)
current_model = model_name
current_device = device
# ビデオをロード
dataset = LoadVideo(path, transforms=preprocess, vid_stride=stride)
dataloader = DataLoader(dataset, batch_size=batch_size, shuffle=False, num_workers=0)
# 画像クエリー機能を取得
if image_search:
image = preprocess(image_search).unsqueeze(0)
query_features = torch.from_numpy(ov_compiled_image_encoder(image)[0])
query_features /= query_features.norm(dim=-1, keepdim=True)
# テキストクエリー機能を取得
else:
# 検索フレーズをトークン化
text = tokenizer([text_search])
# テキストクエリーをエンコード
query_features = torch.from_numpy(ov_compiled_text_encoder(text)[0])
query_features /= query_features.norm(dim=-1, keepdim=True)
# 各フレームをエンコードし、クエリー機能と比較
matches = []
matches_probs = []
res = pd.DataFrame(columns=["Frame", "Timestamp", "Similarity"])
for image, orig, frame, timestamp in dataloader:
with torch.no_grad():
image_features = torch.from_numpy(ov_compiled_image_encoder(image)[0])
image_features /= image_features.norm(dim=-1, keepdim=True)
probs = query_features.cpu().numpy() @ image_features.cpu().numpy().T
probs = probs[0]
# フレーム類似性値を保存
df = pd.DataFrame(
{
"Frame": frame.tolist(),
"Timestamp": torch.round(timestamp / 1000, decimals=2).tolist(),
"Similarity": probs.tolist(),
}
)
res = pd.concat([res, df])
# フレームが閾値を超えていないか確認
for i, p in enumerate(probs):
if p > thresh:
matches.append(to_pil_image(orig[i]))
matches_probs.append(p)
print(f"Frames: {frame.tolist()} - Probs: {probs}")
# 類似性値のプロットを作成
lines = (
alt.Chart(res)
.mark_line(color="firebrick")
.encode(
alt.X("Timestamp", title="Timestamp (seconds)"),
alt.Y("Similarity", scale=alt.Scale(zero=False)),
)
).properties(width=600)
rule = alt.Chart().mark_rule(strokeDash=[6, 3], size=2).encode(y=alt.datum(thresh))
selected_frames = np.argsort(-1 * np.array(matches_probs))[:20]
matched_sorted_frames = [matches[idx] for idx in selected_frames]
return (
lines + rule,
matched_sorted_frames,
) # UI がクラッシュしないよう、最大 20 枚の画像のみを返す
class LoadVideo(Dataset):
def __init__(self, path, transforms, vid_stride=1):
self.transforms = transforms
self.vid_stride = vid_stride
self.cur_frame = 0
self.cap = cv2.VideoCapture(path)
self.total_frames = int(self.cap.get(cv2.CAP_PROP_FRAME_COUNT) / self.vid_stride)
def __getitem__(self, _):
# ビデオを読み込み
# フレームをスキップ
for _ in range(self.vid_stride):
self.cap.grab()
self.cur_frame += 1
# フレームを読み込み
_, img = self.cap.retrieve()
timestamp = self.cap.get(cv2.CAP_PROP_POS_MSEC)
# PIL に変換
img = cv2.cvtColor(img, cv2.COLOR_BGR2RGB)
img = Image.fromarray(np.uint8(img))
# トランスフォームを適用
img_t = self.transforms(img)
return img_t, to_tensor(img), self.cur_frame, timestamp
def __len__(self):
return self.total_frames
desc_text = """
Search the content's of a video with a text description. __Note__: Long videos (over a few minutes) may cause UI performance issues.
"""
text_app = gr.Interface(
description=desc_text,
fn=run,
inputs=[
gr.Video(label="Video"),
gr.Textbox(label="Text Search Query"),
gr.Image(label="Image Search Query", visible=False),
gr.Dropdown(
label="Model",
choices=available_converted_models,
value=model_checkpoint.value,
),
gr.Dropdown(label="Device", choices=available_devices, value=device.value),
gr.Slider(label="Threshold", maximum=1.0, value=0.2),
gr.Slider(label="Frame-rate Stride", value=4, step=1),
gr.Slider(label="Batch Size", value=4, step=1),
],
outputs=[
gr.Plot(label="Similarity Plot"),
gr.Gallery(label="Matched Frames", columns=2, object_fit="contain", height="auto"),
],
examples=[[sample_path / "car-detection.mp4", "white car"]],
allow_flagging="never",
)
desc_image = """
Search the content's of a video with an image query.__Note__: Long videos (over a few minutes) may cause UI performance issues.
"""
image_app = gr.Interface(
description=desc_image,
fn=run,
inputs=[
gr.Video(label="Video"),
gr.Textbox(label="Text Search Query", visible=False),
gr.Image(label="Image Search Query", type="pil"),
gr.Dropdown(
label="Model",
choices=available_converted_models,
value=model_checkpoint.value,
),
gr.Dropdown(label="Device", choices=available_devices, value=device.value),
gr.Slider(label="Threshold", maximum=1.0, value=0.2),
gr.Slider(label="Frame-rate Stride", value=4, step=1),
gr.Slider(label="Batch Size", value=4, step=1),
],
outputs=[
gr.Plot(label="Similarity Plot"),
gr.Gallery(label="Matched Frames", columns=2, object_fit="contain", height="auto"),
],
allow_flagging="never",
examples=[[sample_path / "coco.mp4", None, sample_path / "dog.png"]],
)
demo = gr.TabbedInterface(
interface_list=[text_app, image_app],
tab_names=["Text Query Search", "Image Query Search"],
title="CLIP Video Content Search",
)
try:
demo.launch(debug=False)
except Exception:
demo.launch(share=True, debug=False)
# リモートで起動する場合は、server_name と server_port を指定
# demo.launch(server_name='your server name', server_port='server port in int')
# 詳細はドキュメントをご覧ください: https://gradio.app/docs/data/car-detection.mp4: 0%| | 0.00/2.68M [00:00<?, ?B/s]data/coco.mp4: 0%| | 0.00/877k [00:00<?, ?B/s]ローカル URL で実行中: http://127.0.0.1:7860 パブリックリンクを作成するには、launch() で share=True を設定します。